
Custom Gown Checklist: What You Get With a Hand-Finished Piece
2nd Aug 2026
Creating a custom wedding gown is not simply a matter of cutting fabric and sewing pieces together. A couture dress requires pattern development, multiple fitting stages, hand embroidery, structural adjustments, and detailed finishing. In this article, we share the complete making process of a yellow ball gown wedding dress, from the first muslin toile to the final quality inspection.
We quote 60 to 90 days on this one, and that's not padding — it's just realistic. The first couple of weeks are all toile. We use plain muslin, nothing fancy, because there's no point wasting the good tulle on something that's probably going to get ripped apart and redraped at least once. The bodice gets draped separately from the skirt, which sounds obvious but you'd be surprised how many people try to do it all in one go. You can't. The proportions don't work that way.
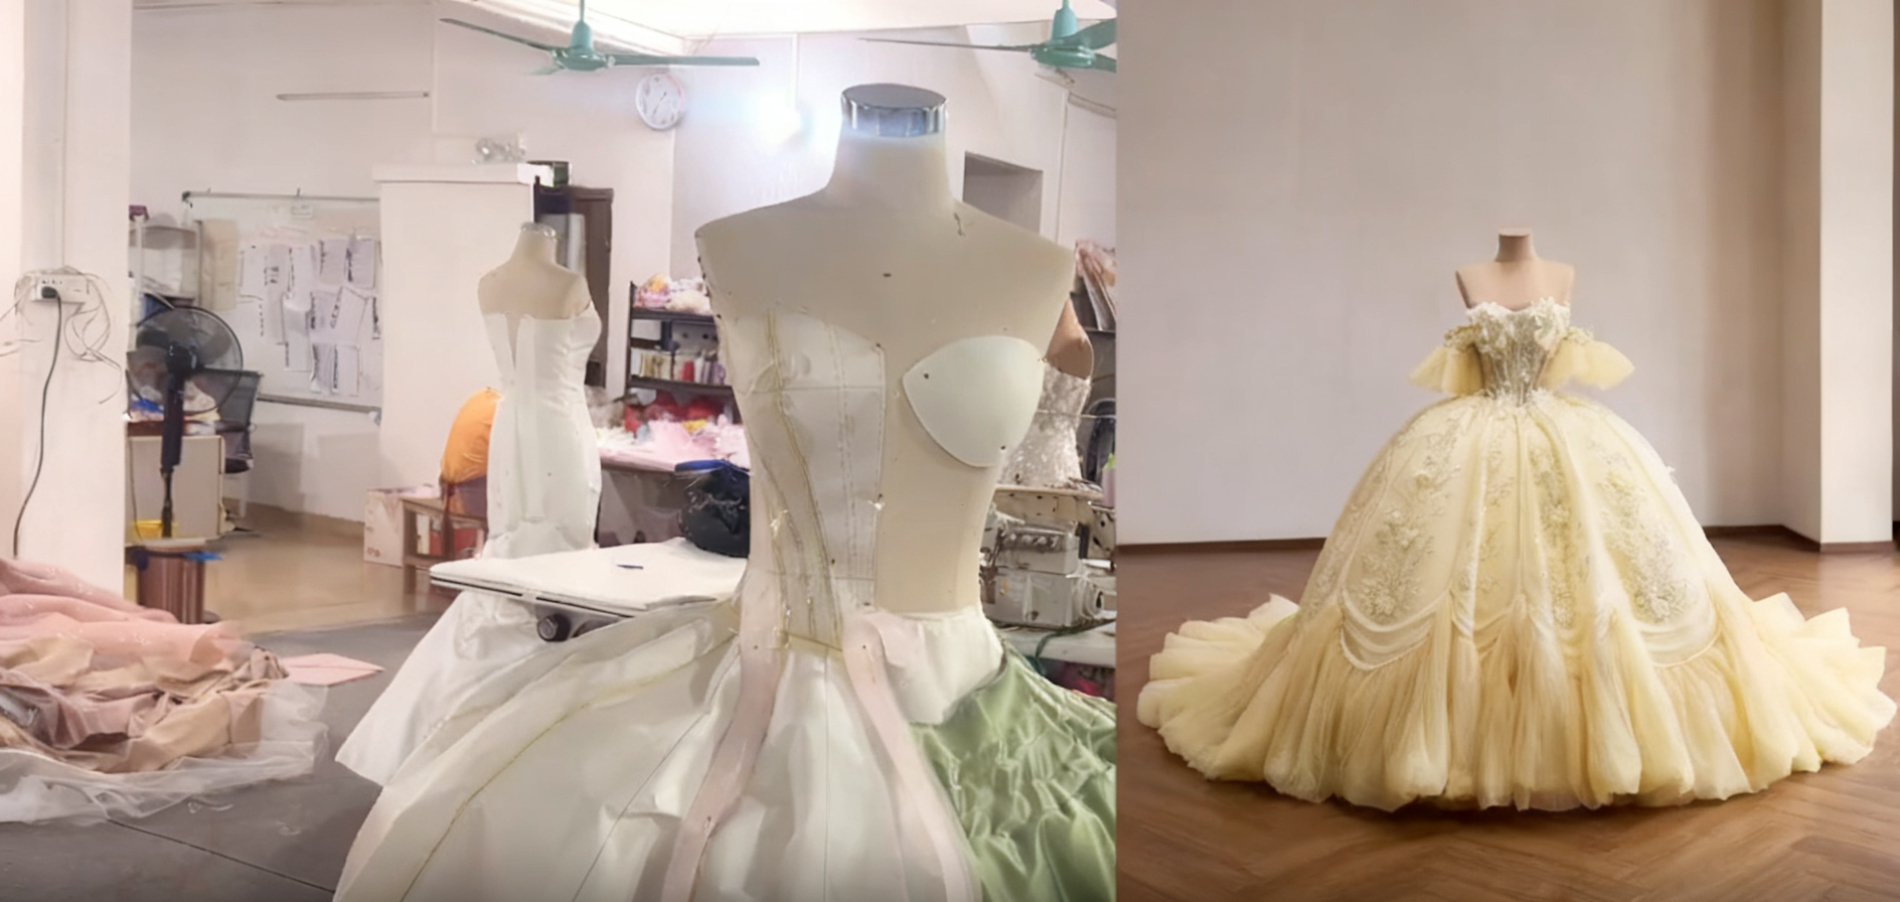
(Left: Toile draping on dress form – building the bodice and skirt base in muslin. We test the volume, adjust the proportions, and finalize the pattern before moving to the actual fabric.
Right: Completed champagne court ballgown – fully beaded, embroidered, and assembled. The adjustable 12-piece underskirt is integrated, allowing two silhouette options in one gown.)
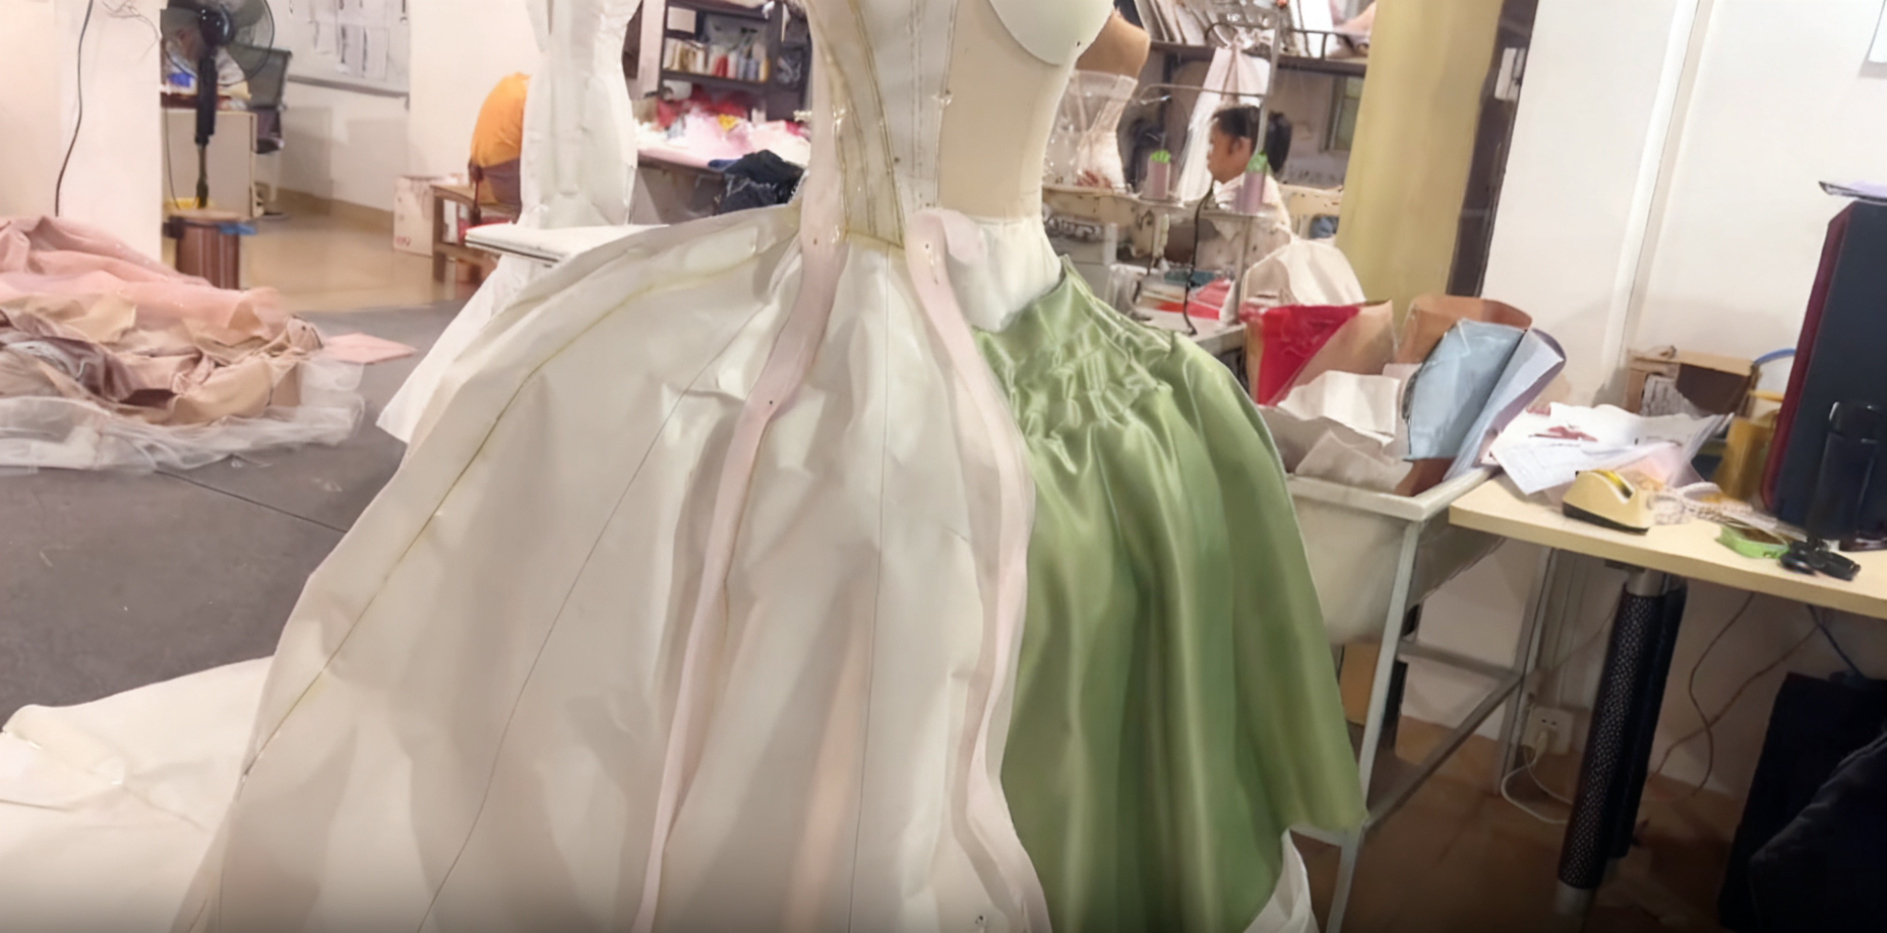
(Skirt draping and silhouette adjustment. The oversized ballgown skirt is shaped on the dress form using white muslin to establish the full volume and flare. We mark the seam lines and panel points directly on the fabric, then adjust the layering and drop ratio until the skirt falls correctly. This sets the pattern baseline for cutting the final fabric.)
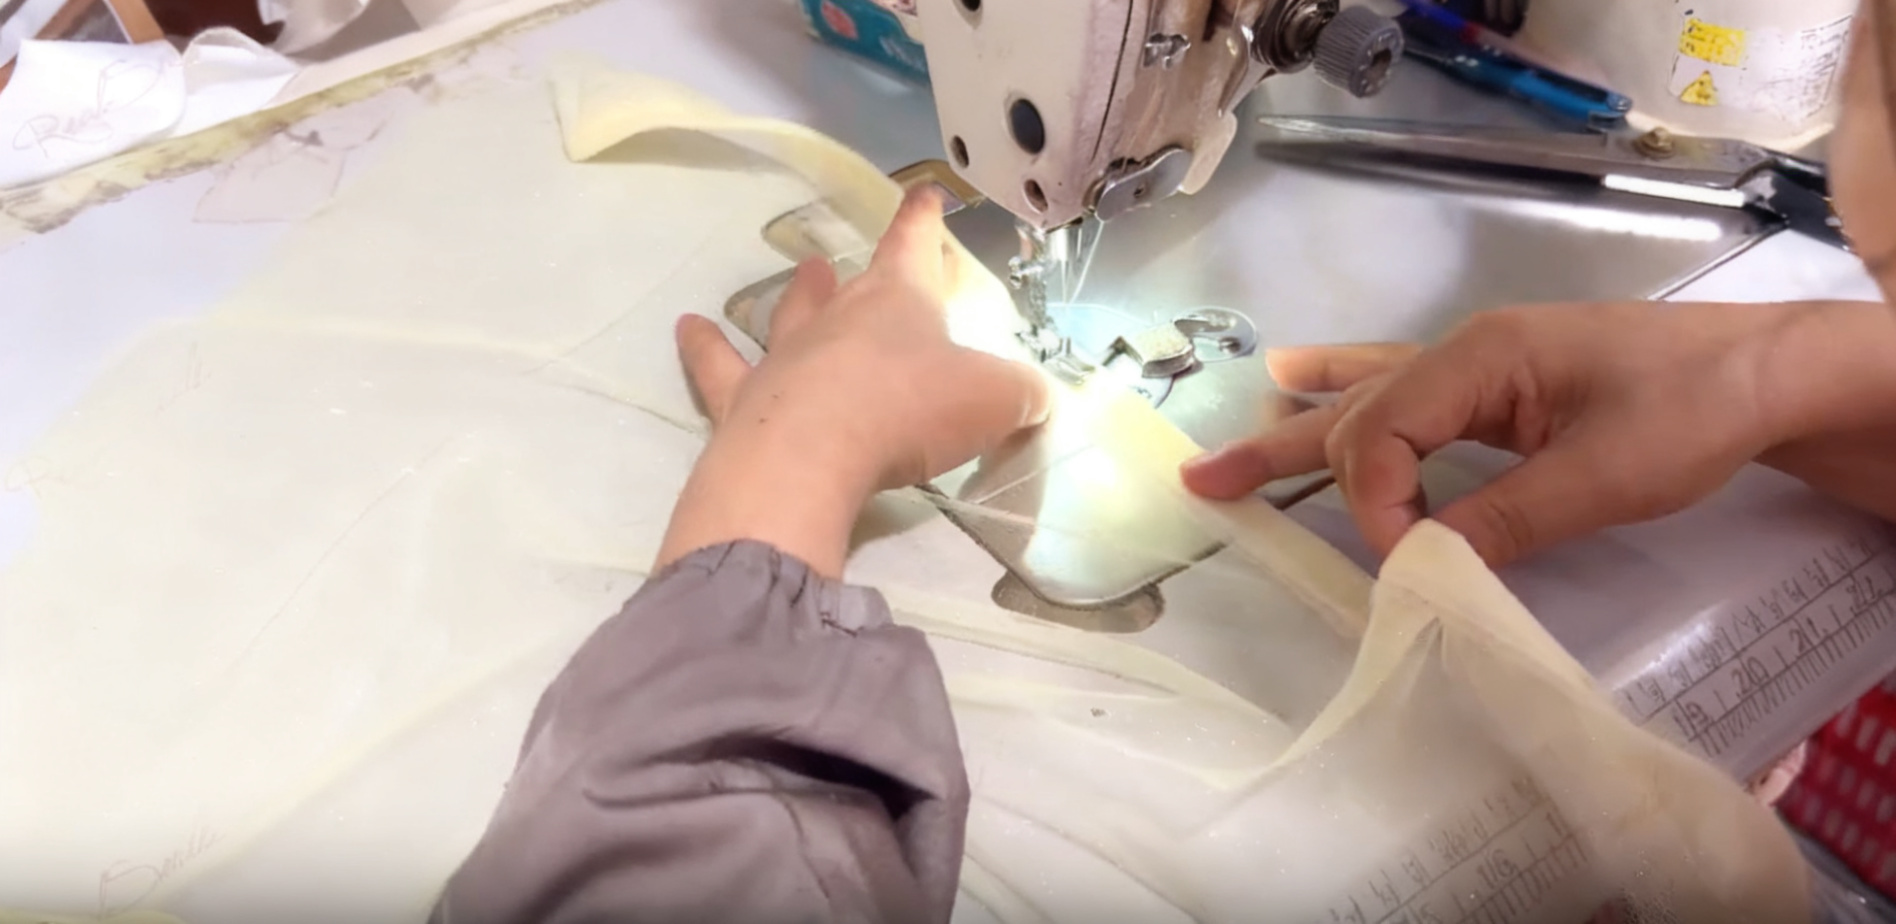
(Glitter tulle edge finishing. The cut panels of champagne glitter tulle are overlocked along the edges to prevent fraying and keep the fabric edges clean and even. This is a standard pre-assembly step for the base tulle layers of the skirt.)
Once the toile behaves itself, we move to the real fabric. Everything is cut by hand off the paper patterns. No CNC table, no laser — just shears and a steady hand. The glitter tulle frays like crazy if you don't catch it early, so we overlock every single piece right after cutting. Skip that step and you'll spend twice as long picking loose threads off the beadwork later. Ask me how I know.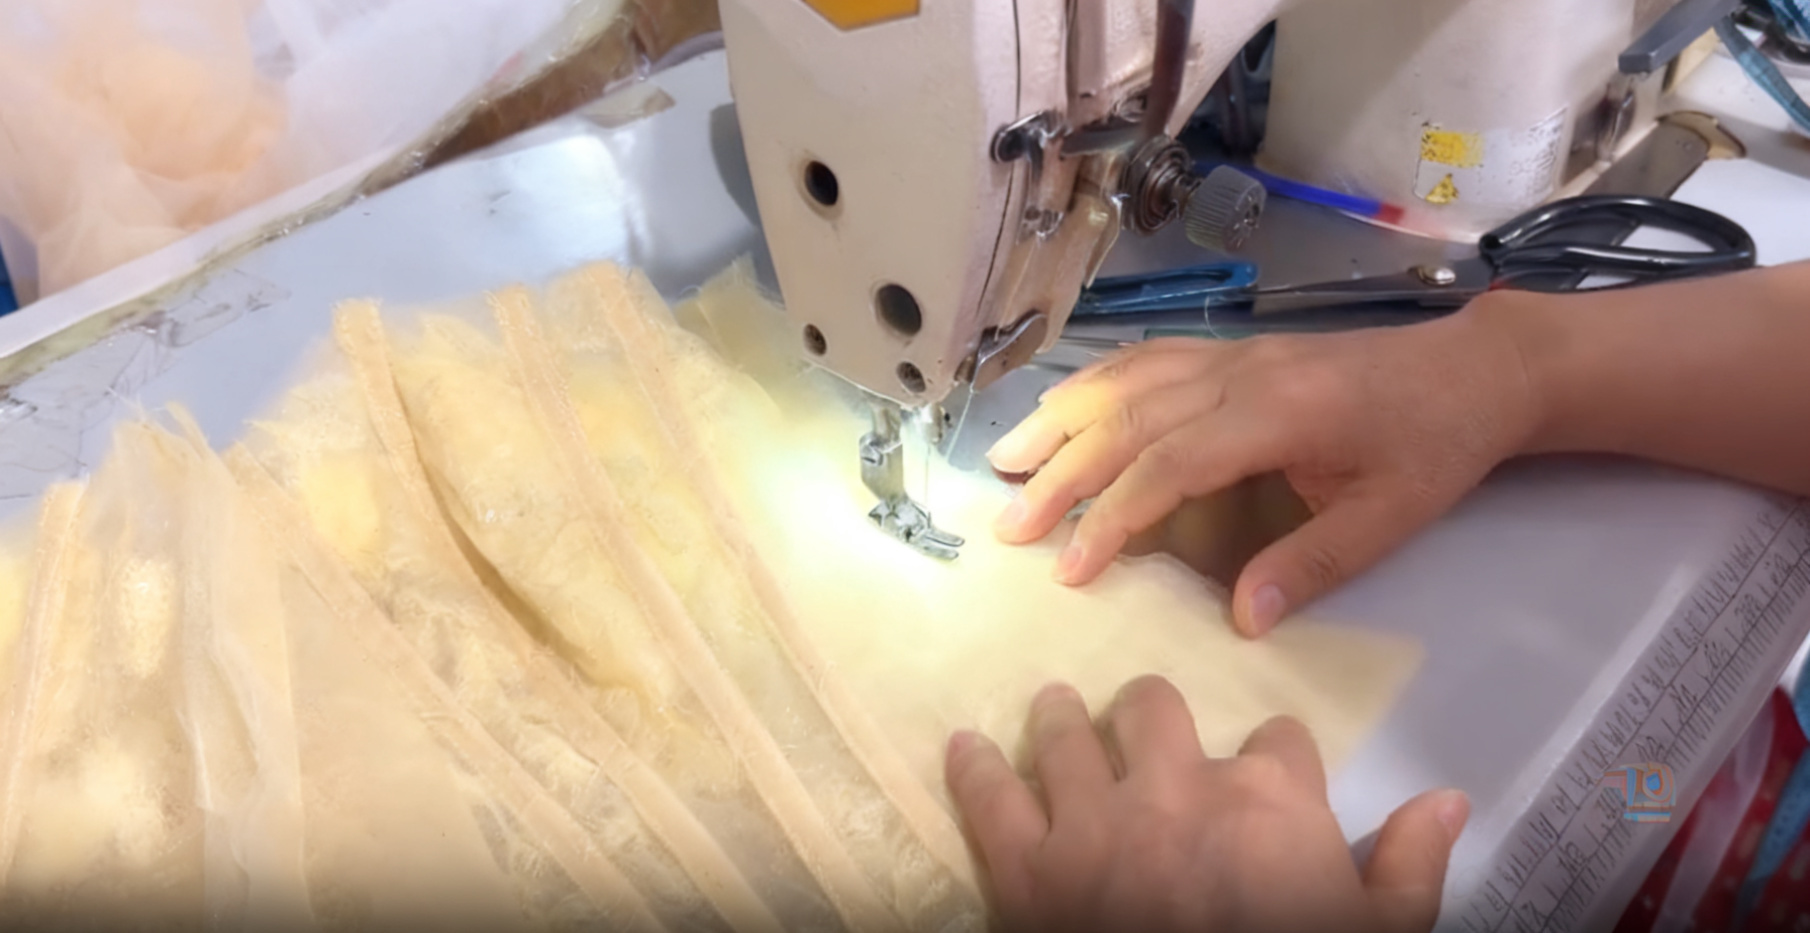
(Assembling the base tulle layers. Glitter tulle panels are seamed together to form the skirt's foundational underlayer and overall volume.)
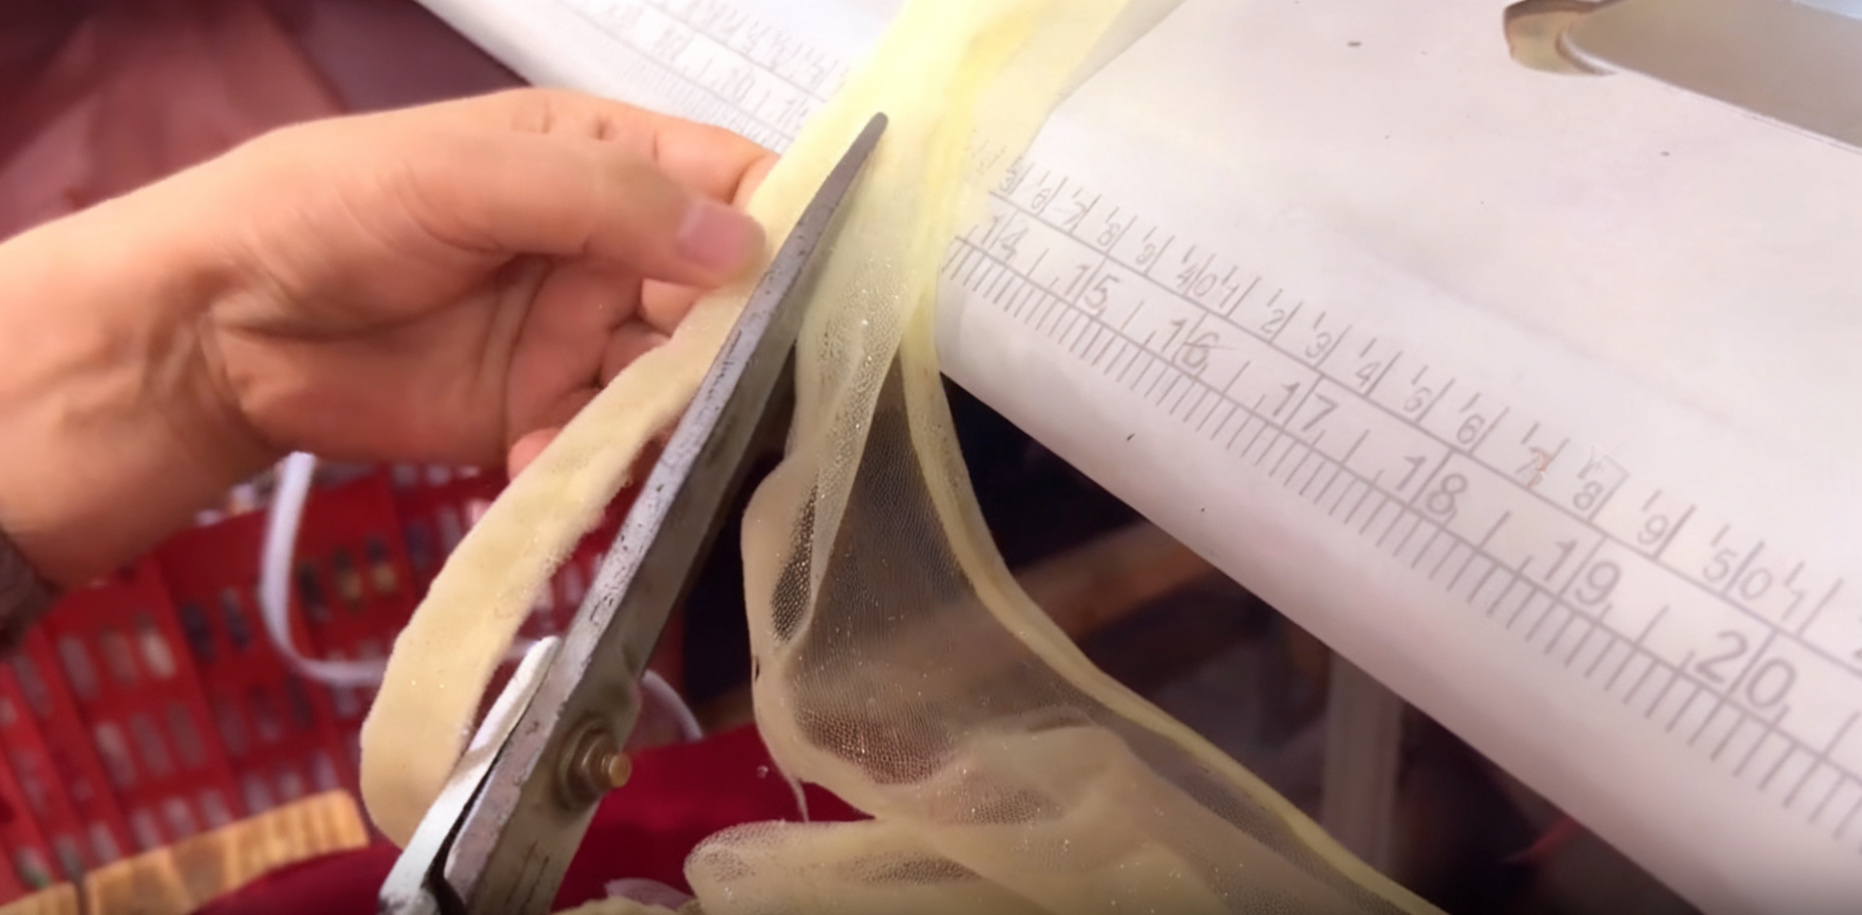
(Hand-cutting glitter tulle panels. Each piece is trimmed to the paper pattern for consistent sizing, including all hem and trim panels.)
The bodice construction is straightforward but fussy. Double-layer power mesh, flexible boning, nothing too stiff because nobody wants to spend an evening getting poked in the ribs. This construction provides support while allowing comfortable movement throughout the wedding day.The sheer mesh on top is meant to show the boning slightly — it's not a mistake, it's part of the look. We've had clients ask if the bones are supposed to be visible, and yes, that's the point. It reads as structure, not scaffolding.
(Lace underlay construction. The lace foundation fabric is sewn to the bodice pattern dimensions, creating the structural base for the bodice embellishment. This layer supports the weight and placement of all hand-applied beadwork and three-dimensional floral appliqués.)
Beading is where the schedule really stretches out. We keep three people rotating on this because eight hours of straight hand-sewing beads will wreck your eyesight and your patience. Each flower cluster gets laid out individually; we don't use premade motifs because they never sit quite right on curved panels. The bead count is heavier toward the hem and lighter near the waist, which gives the embroidery some movement instead of looking like a solid block of sparkle. That gradient takes planning — you can't just wing it and hope it works out.
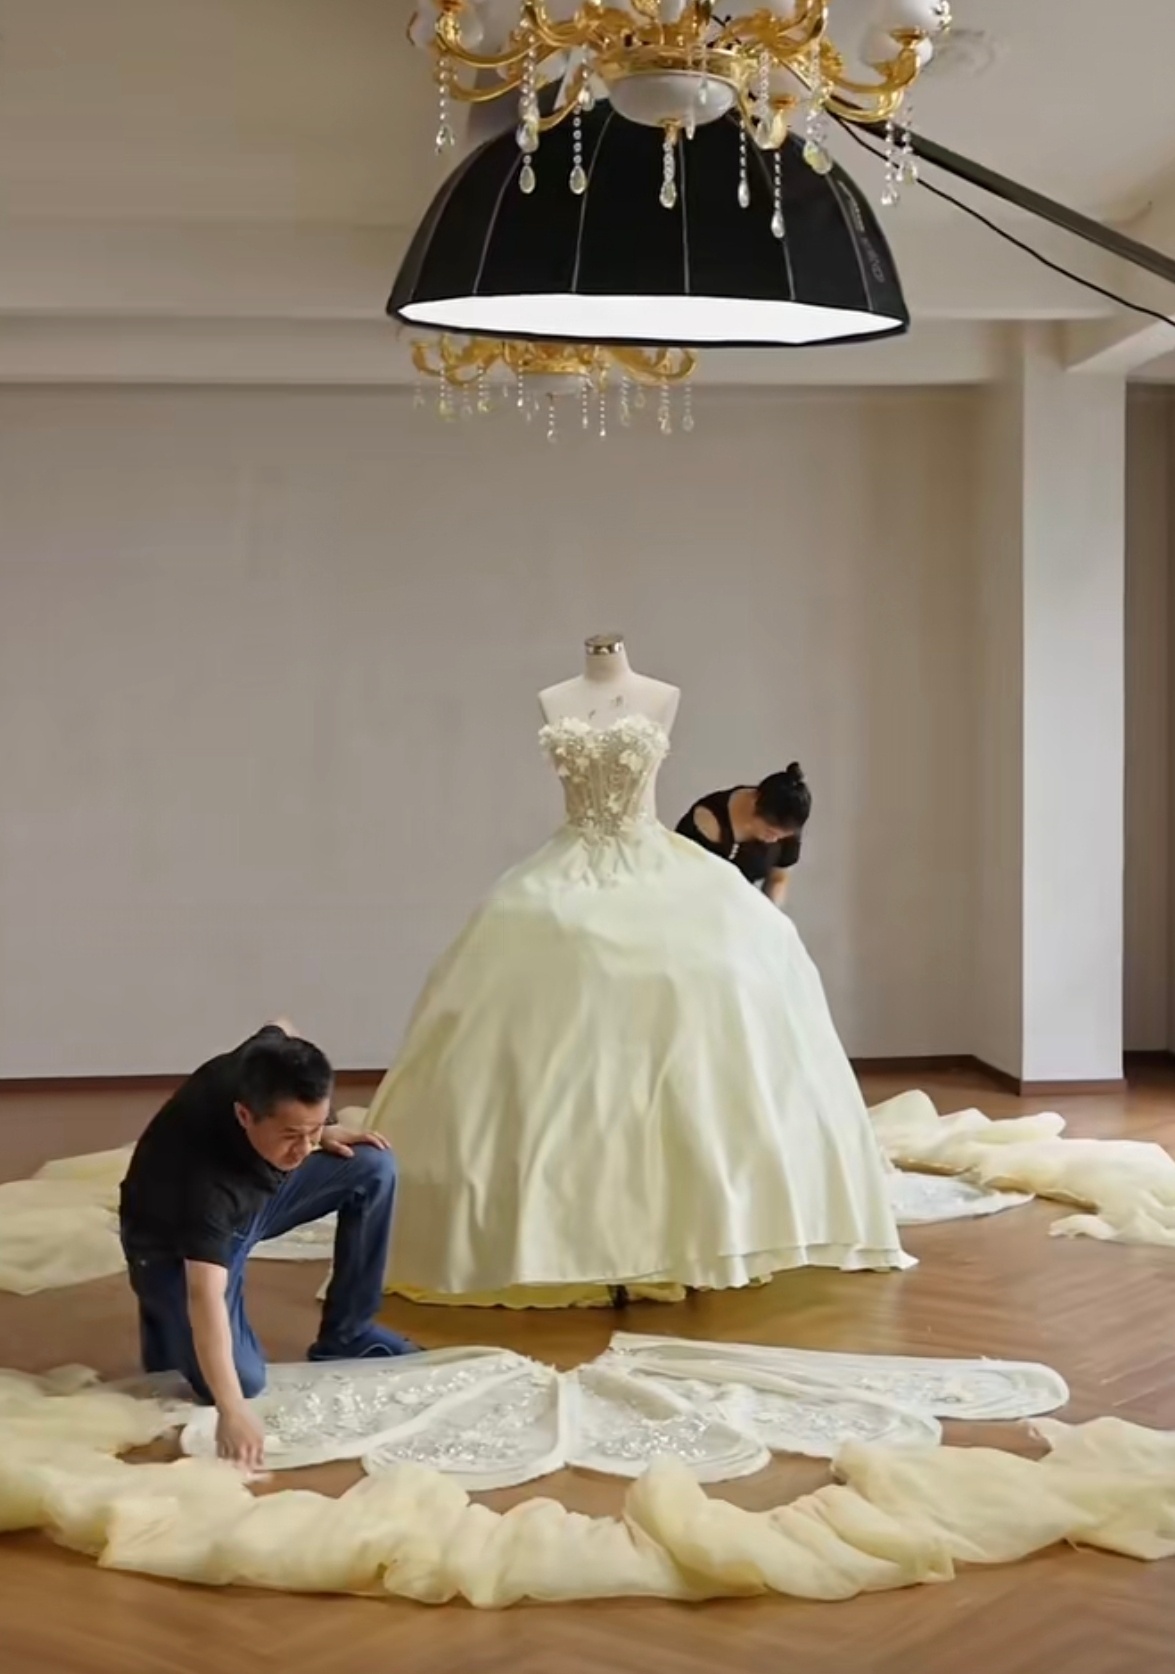
(Spreading out the finished embroidered skirt panels. Each pre-beaded and embroidered section is laid flat to verify the floral pattern continuity and panel sizing before the skirt is assembled and gathered.)
For the skirt, we spread the embroidered panels across the floor. Because the embroidered panels exceed the size of our cutting table, we carefully arrange them on a clean workspace floor to check pattern continuity before final assembly.We shuffle them around until the floral pattern runs continuously from the front panels into the train. The front gets aligned for symmetry first, then the train panels go on last with the flowers spacing out toward the ends so the transition doesn't look chopped off. That part takes a full day, sometimes more if the pattern is particularly dense.
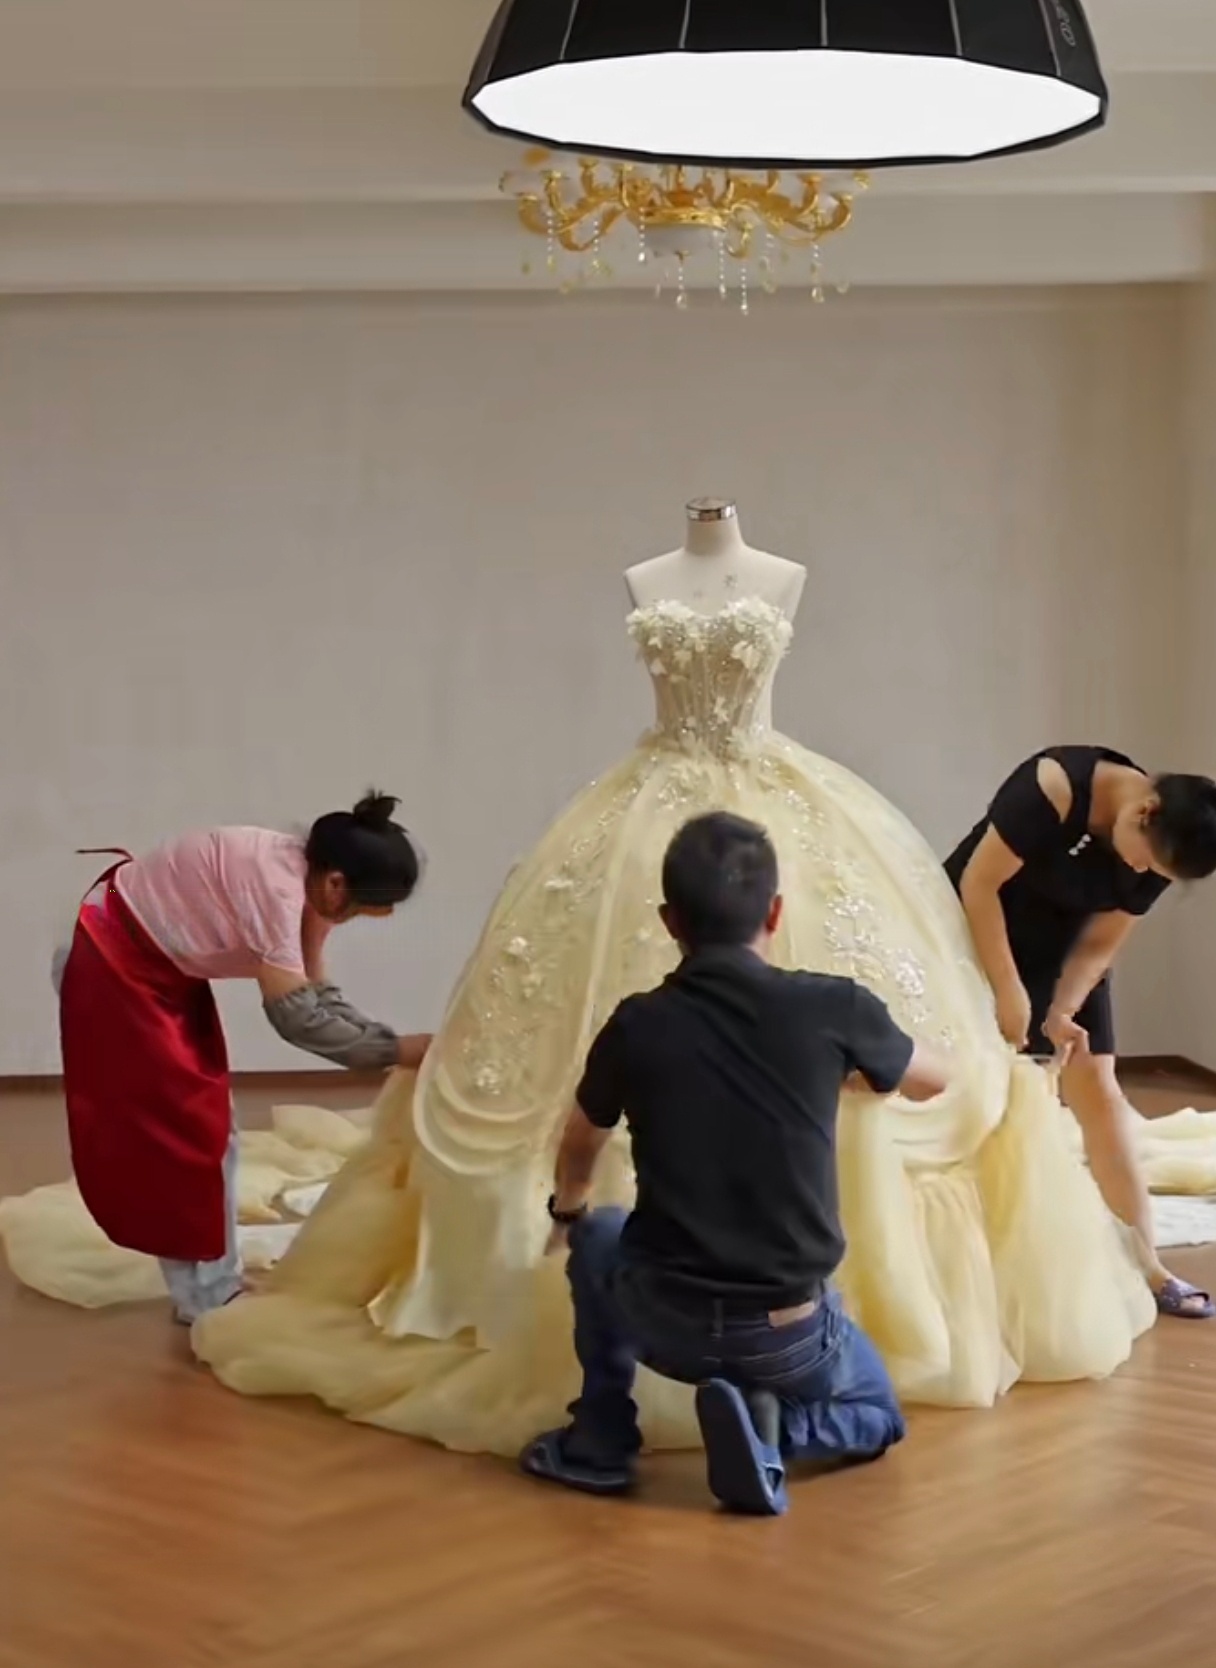
(Skirt layer volume adjustment. The artisan kneels to fine-tune the drape of each individual skirt panel, adjusting the fold height and symmetry across the full skirt to lock in the final shape of the outer ruffled layers.)
The underskirt system is twelve separate panels with hooks. All twelve hooked in gives you the full ballgown volume. Take some out and it drops into an A-line. It's a simple mechanism but it has to work cleanly — no slipping, no catching, no weird bunching under the outer skirt. We test the hooks repeatedly during assembly and again at the final check. Once is not enough.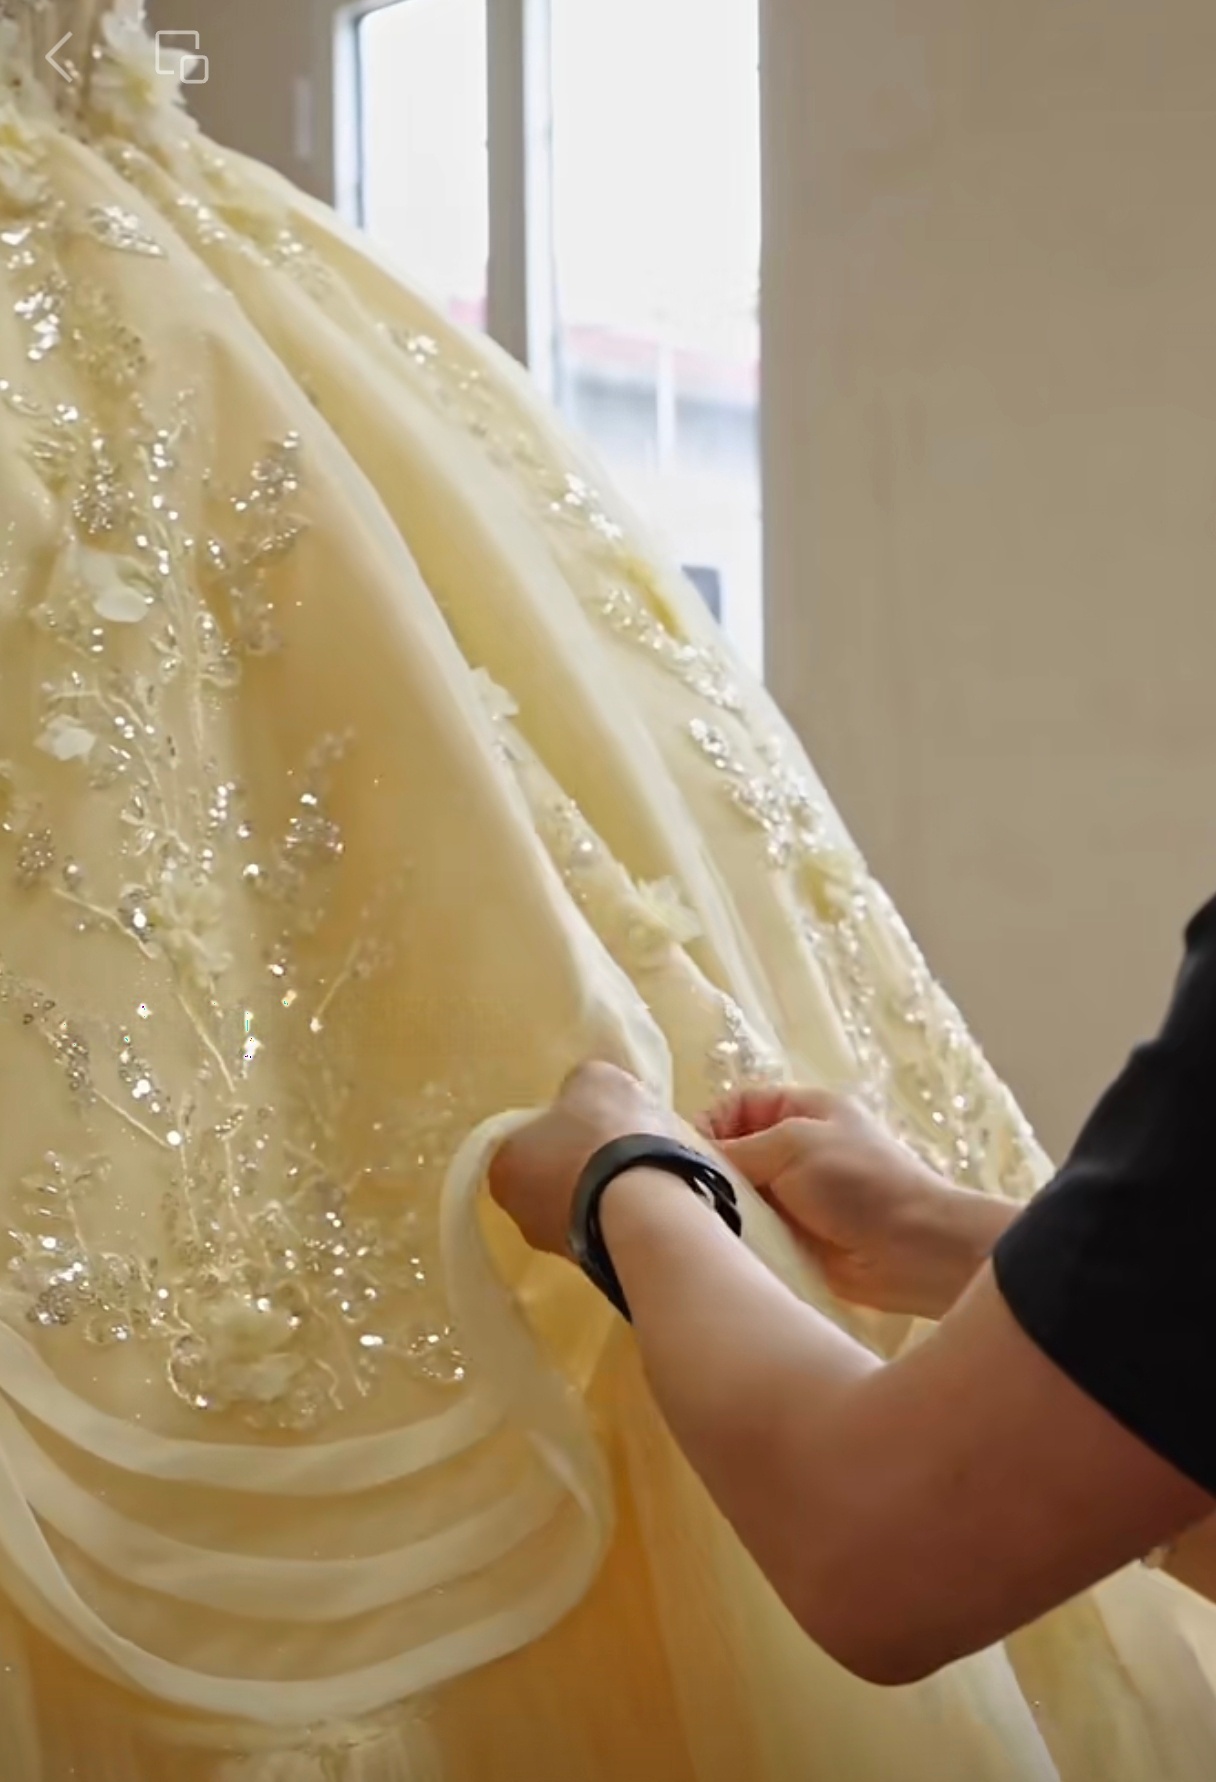
(Hand-pinning the gathered tulle. Each outer layer is pinned and secured by hand to create the gown's signature cascading ruffled hem, with the tension and curve adjusted individually.)
The pleats on the cuffs and hem get pressed with heat, but glitter tulle is tricky. It doesn't hold a crease like cotton, and it melts if you're not careful. So we use a protective cloth between the press plate and the fabric. The hem itself is six curved panels sewn together into a scalloped edge. Each panel is cut and sewn individually before joining, which takes longer but gives a cleaner result than trying to force one continuous piece into that shape.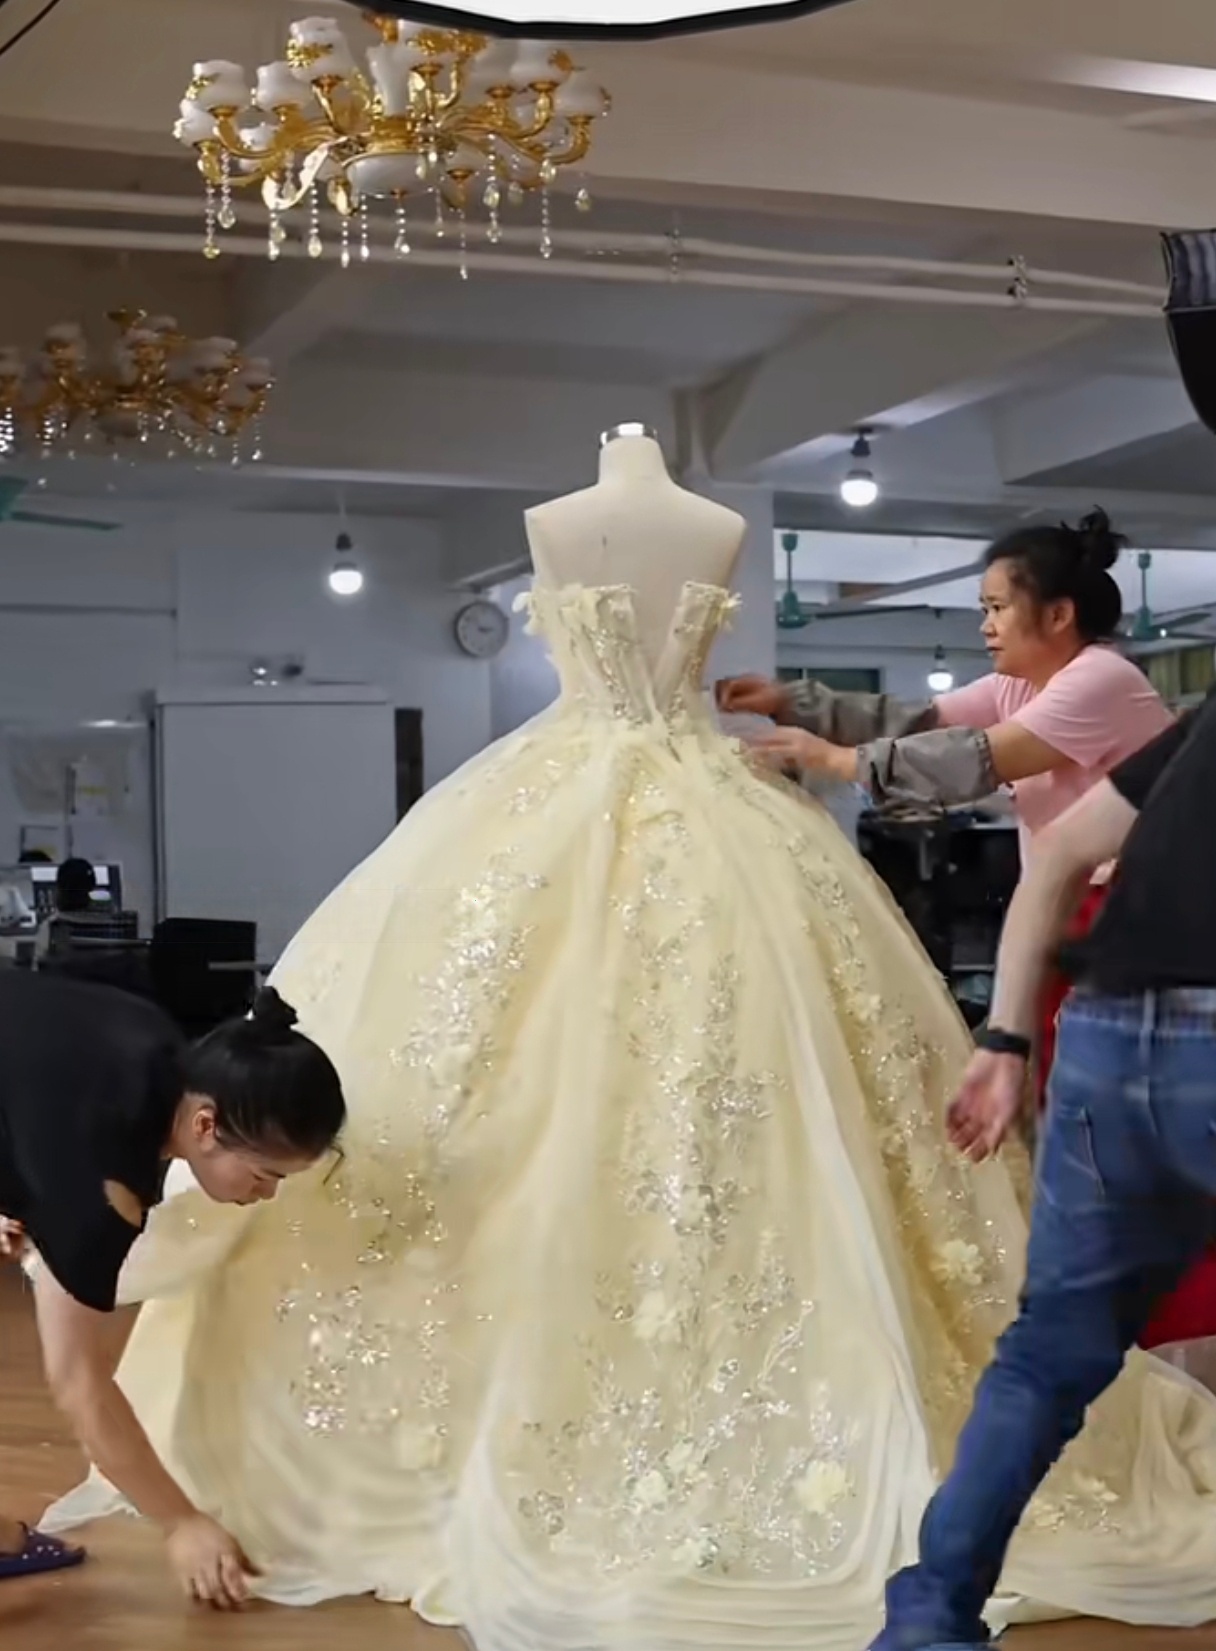
(Train panel positioning. Each train section is aligned with the main skirt to confirm the floral pattern runs continuously from the bodice down through the train for a seamless transition.)
At the very end, the whole thing goes back on the form. We check it from every angle, trim loose threads, re-secure any beads that look even slightly off, and steam the tulle layers to settle the fabric. The underskirt hooks get tested one final time. Then it's packed and ready to go.
Sixty working days is the baseline. Add a week or so if the beadwork is unusually dense or if the client wants adjustments after the fitting.
- #12-piece underskirt system
- #ball gown production timeline
- #custom gown fitting and adjustments
- #flexible boning in ball gown bodice
- #floral embroidery layout on skirt panels
- #glitter tulle gown finishing
- #hand cutting tulle for evening gowns
- #how a custom ball gown is made
- #scalloped hem gown construction
- #steam finishing for tulle gowns