
What It Really Takes to Sew Your Own Prom Dress
13th Jun 2026
I am selling wedding dress and prom dresses for many years,but making my own prom dress had always been more of a daydream than a real plan. I didn't want something I'd wear once and forget. I wanted a dress that – I don't know – if I look back twenty years from now, I'd still think "yep, that's so me." The idea was simple enough: a fitted bodice, a big dramatic skirt, plus a little vintage romantic vibe. And I figured this was the perfect excuse to finally try boning, embroidery, and some fabric manipulation I'd been admiring for years.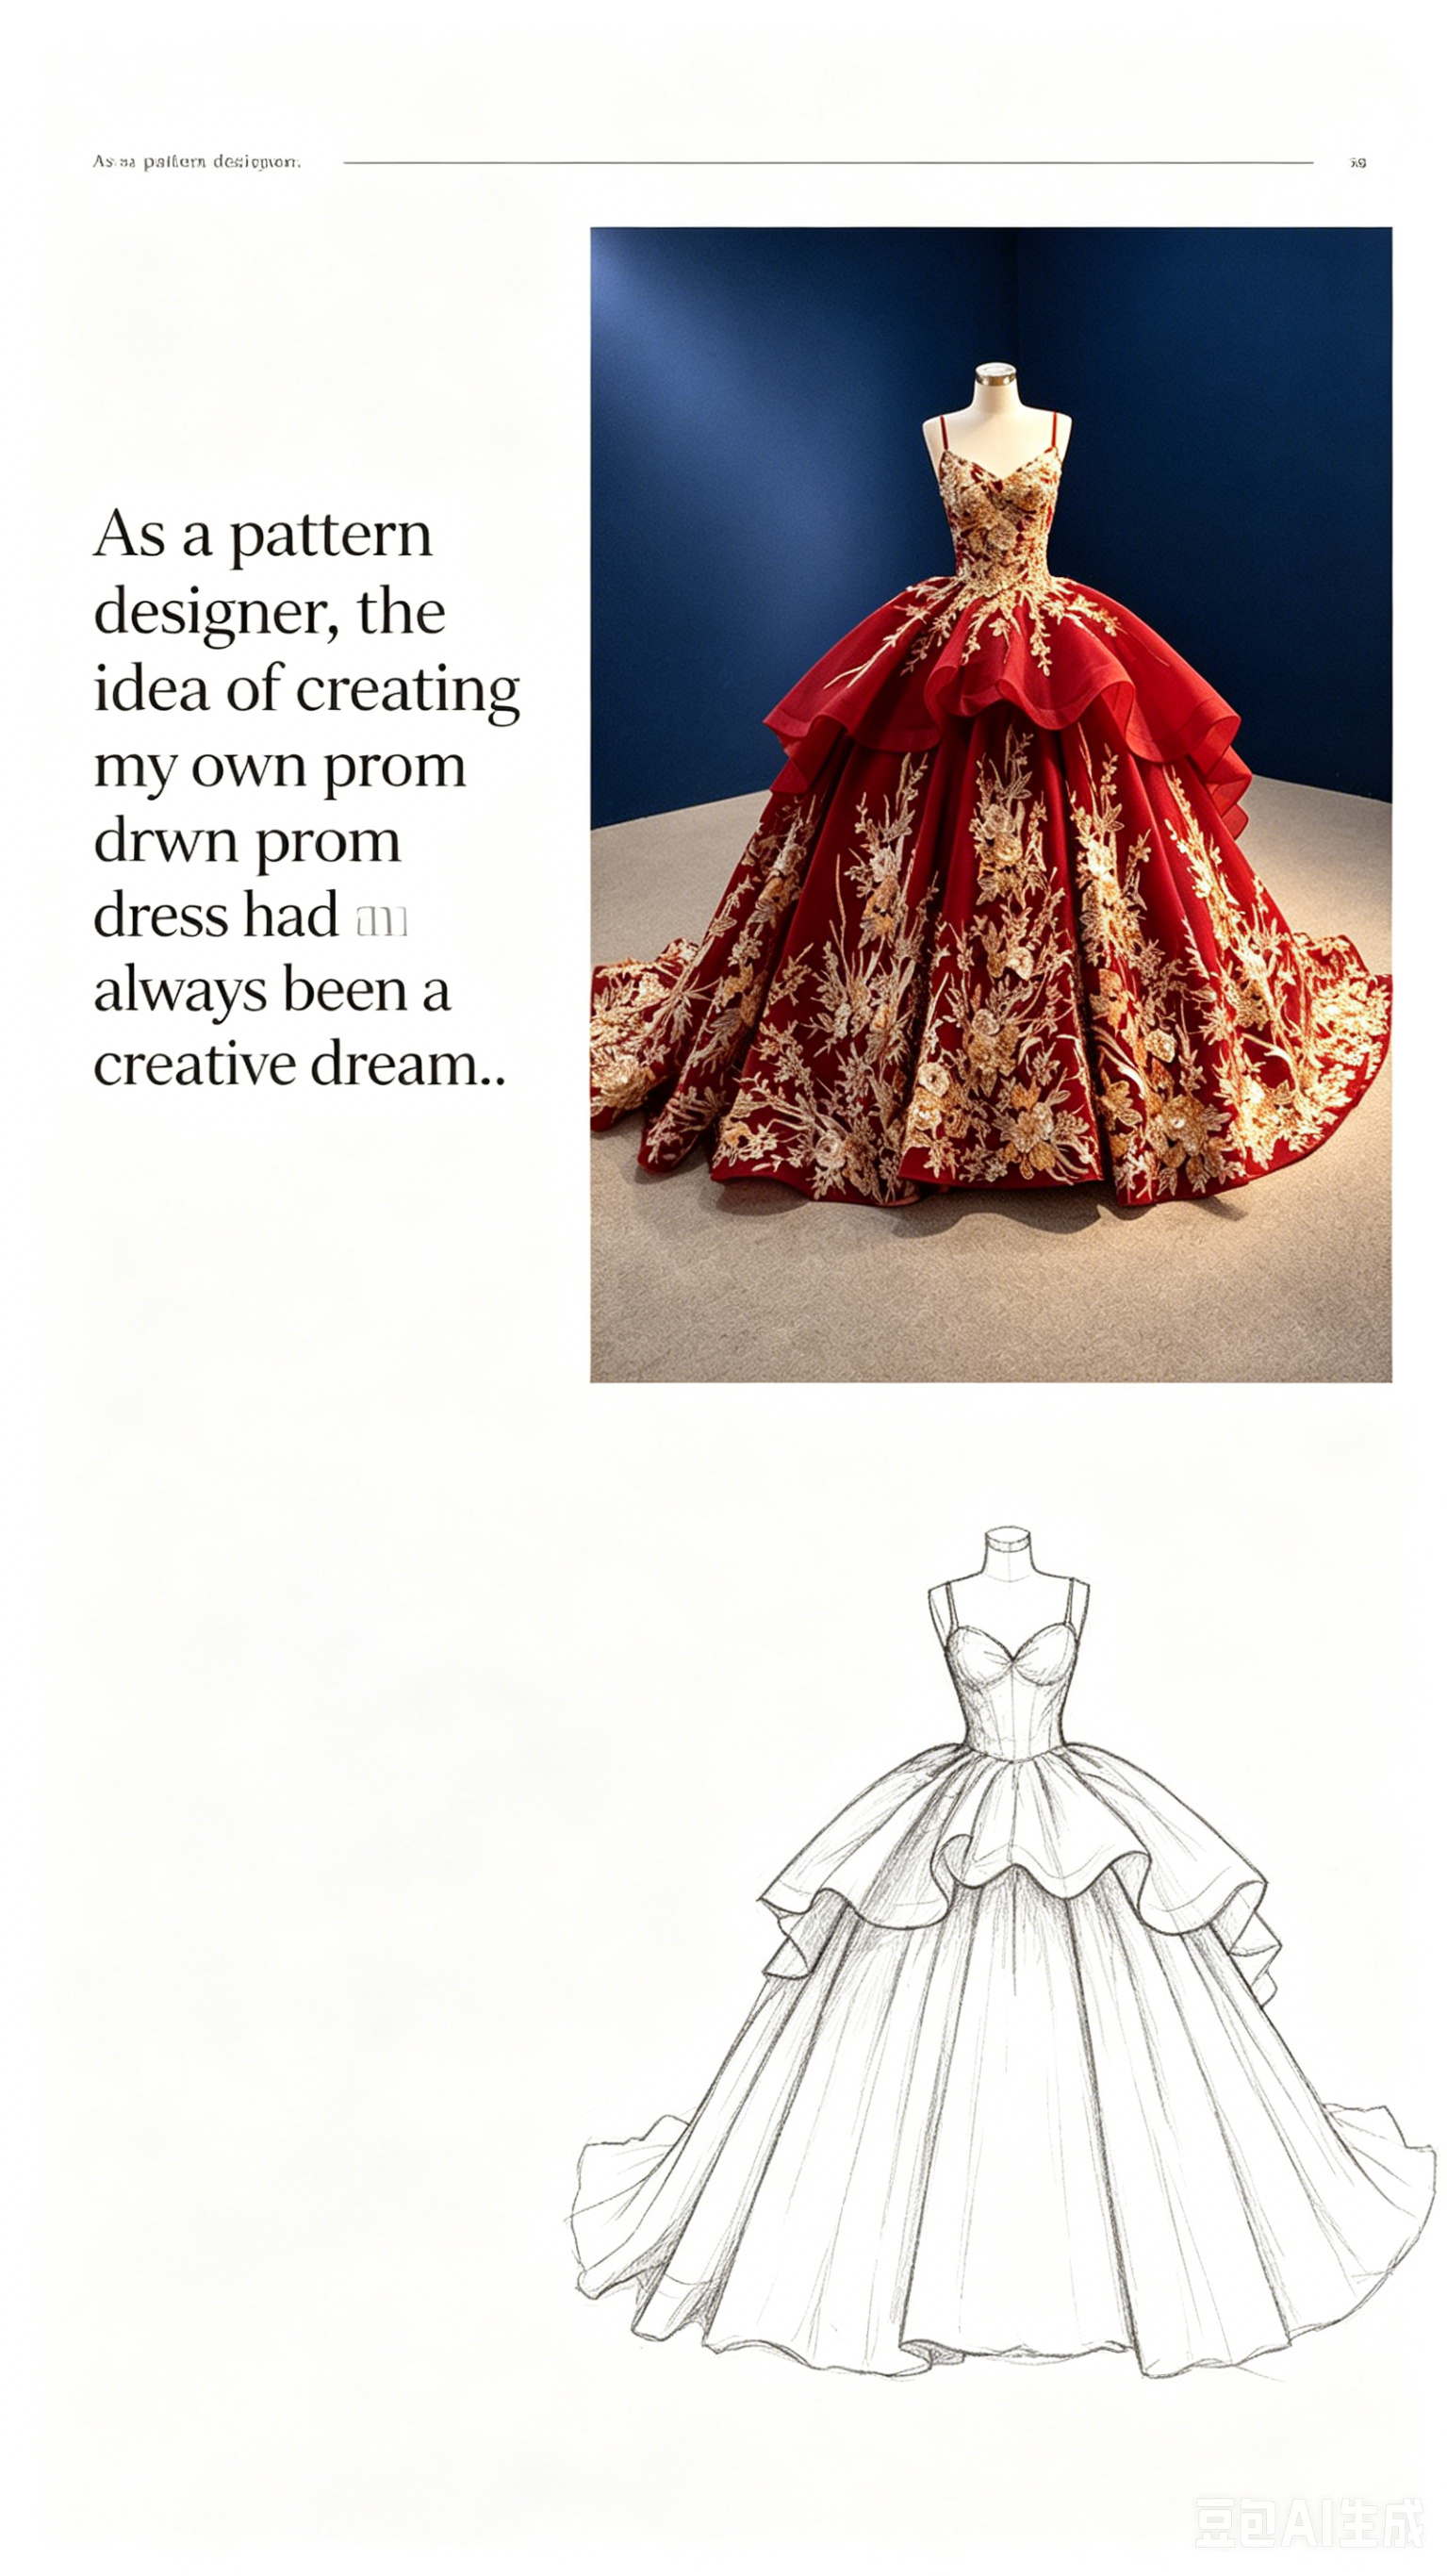
Where the idea came from
I dug out a vintage 1950s ball gown pattern I'd bought ages ago and never used. It had that tiny waist and huge skirt shape I've always loved. I didn't plan to copy it exactly, but the bust and waist fit was almost scary – like it was made for my measurements. So I thought, okay, this is my starting point.
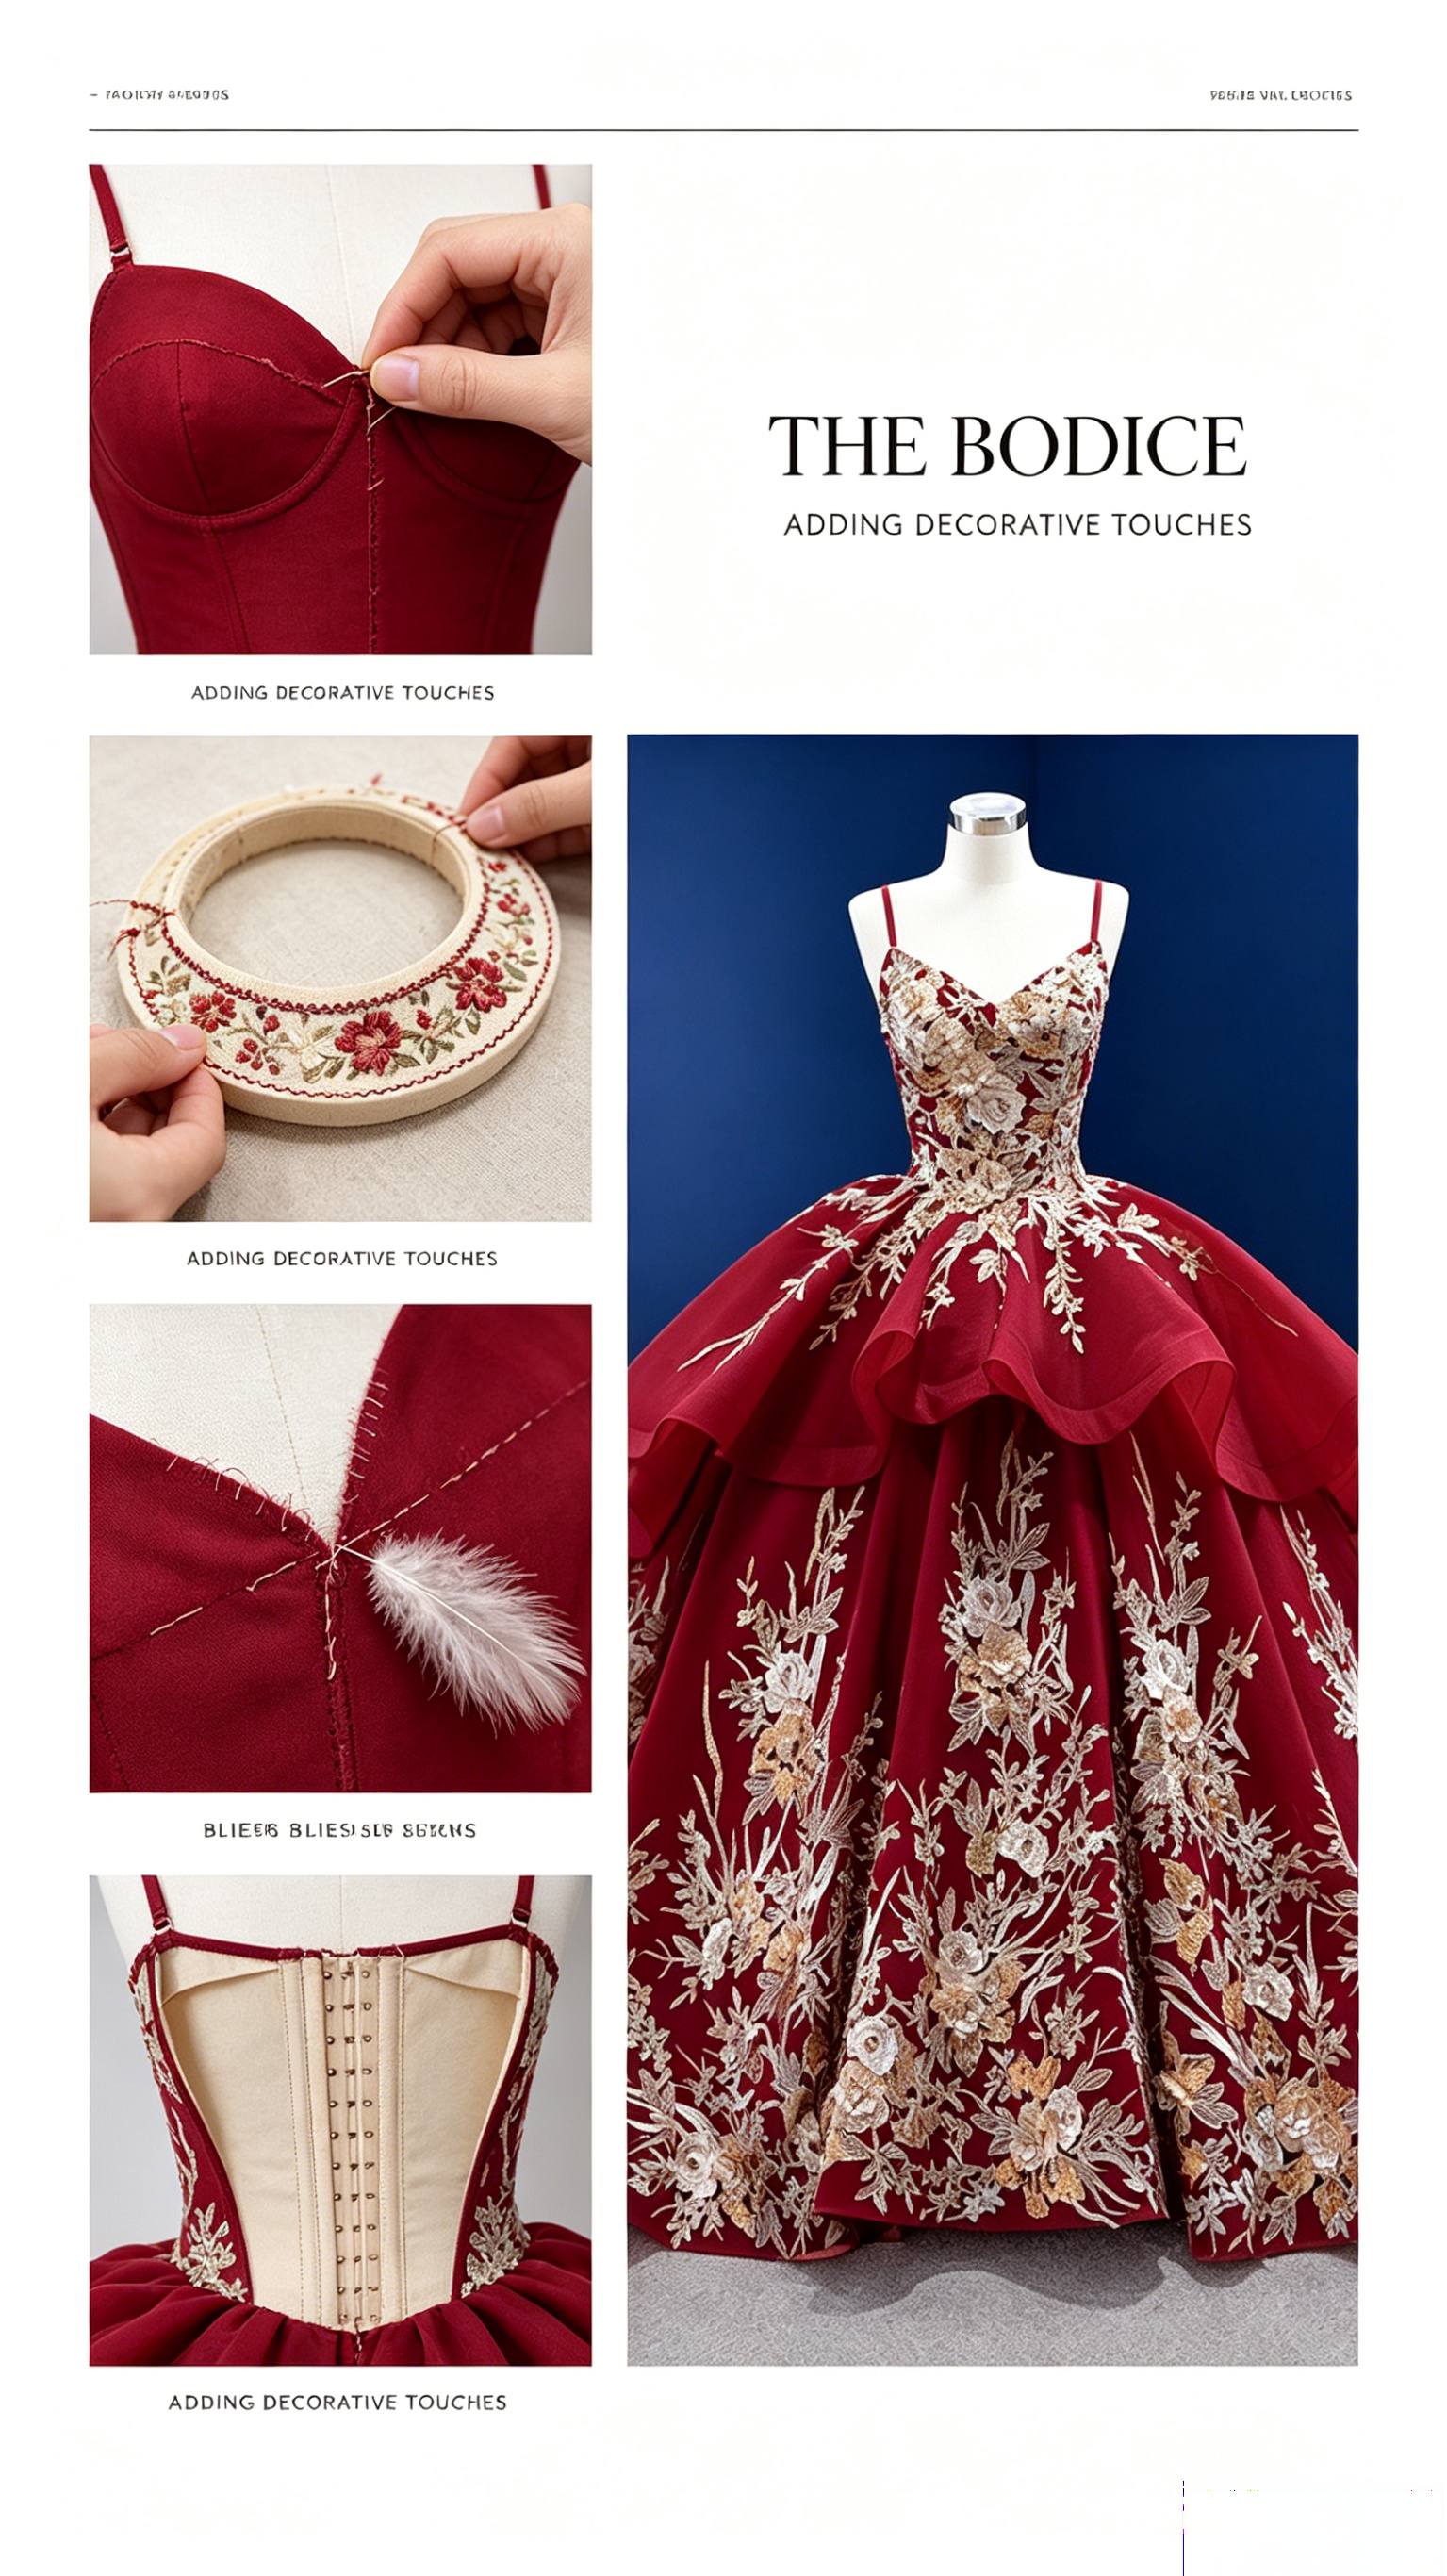
The corset bodice (the scary part)
I started with the hardest bit: the corset-style bodice. I used the "Pretty House Maid" pattern by Clockworkfaerie – apparently inspired by old early 1900s Symington corset factories. First time making a real structured corset, honestly I had no idea what I was getting into. I used cotton coutil for the base, plus a smooth satin lining on top so the outer fabric wouldn't bunch. Front closure with metal busks, spiral steel boning. I followed a video tutorial for the corded channels – and somehow, it didn't go wrong.
The biggest surprise? Trying it on. It fit my body even better than my dress form. Like, hugged every curve perfectly. I remember thinking, okay, the rest of the dress is going to be so much easier now.
Hunting for fabric
While the corset was coming together, I went fabric hunting. Fell in love with this embroidered tulle from a small studio – delicate ivory floral patterns, super light and floaty. Perfect for a big skirt. But tulle alone is too see-through, so I got a pure silk charmeuse lining in the same ivory shade. And to keep the boning from poking through, I added a lightweight cotton interlining. That way I could wear the corset on its own later, maybe for another event.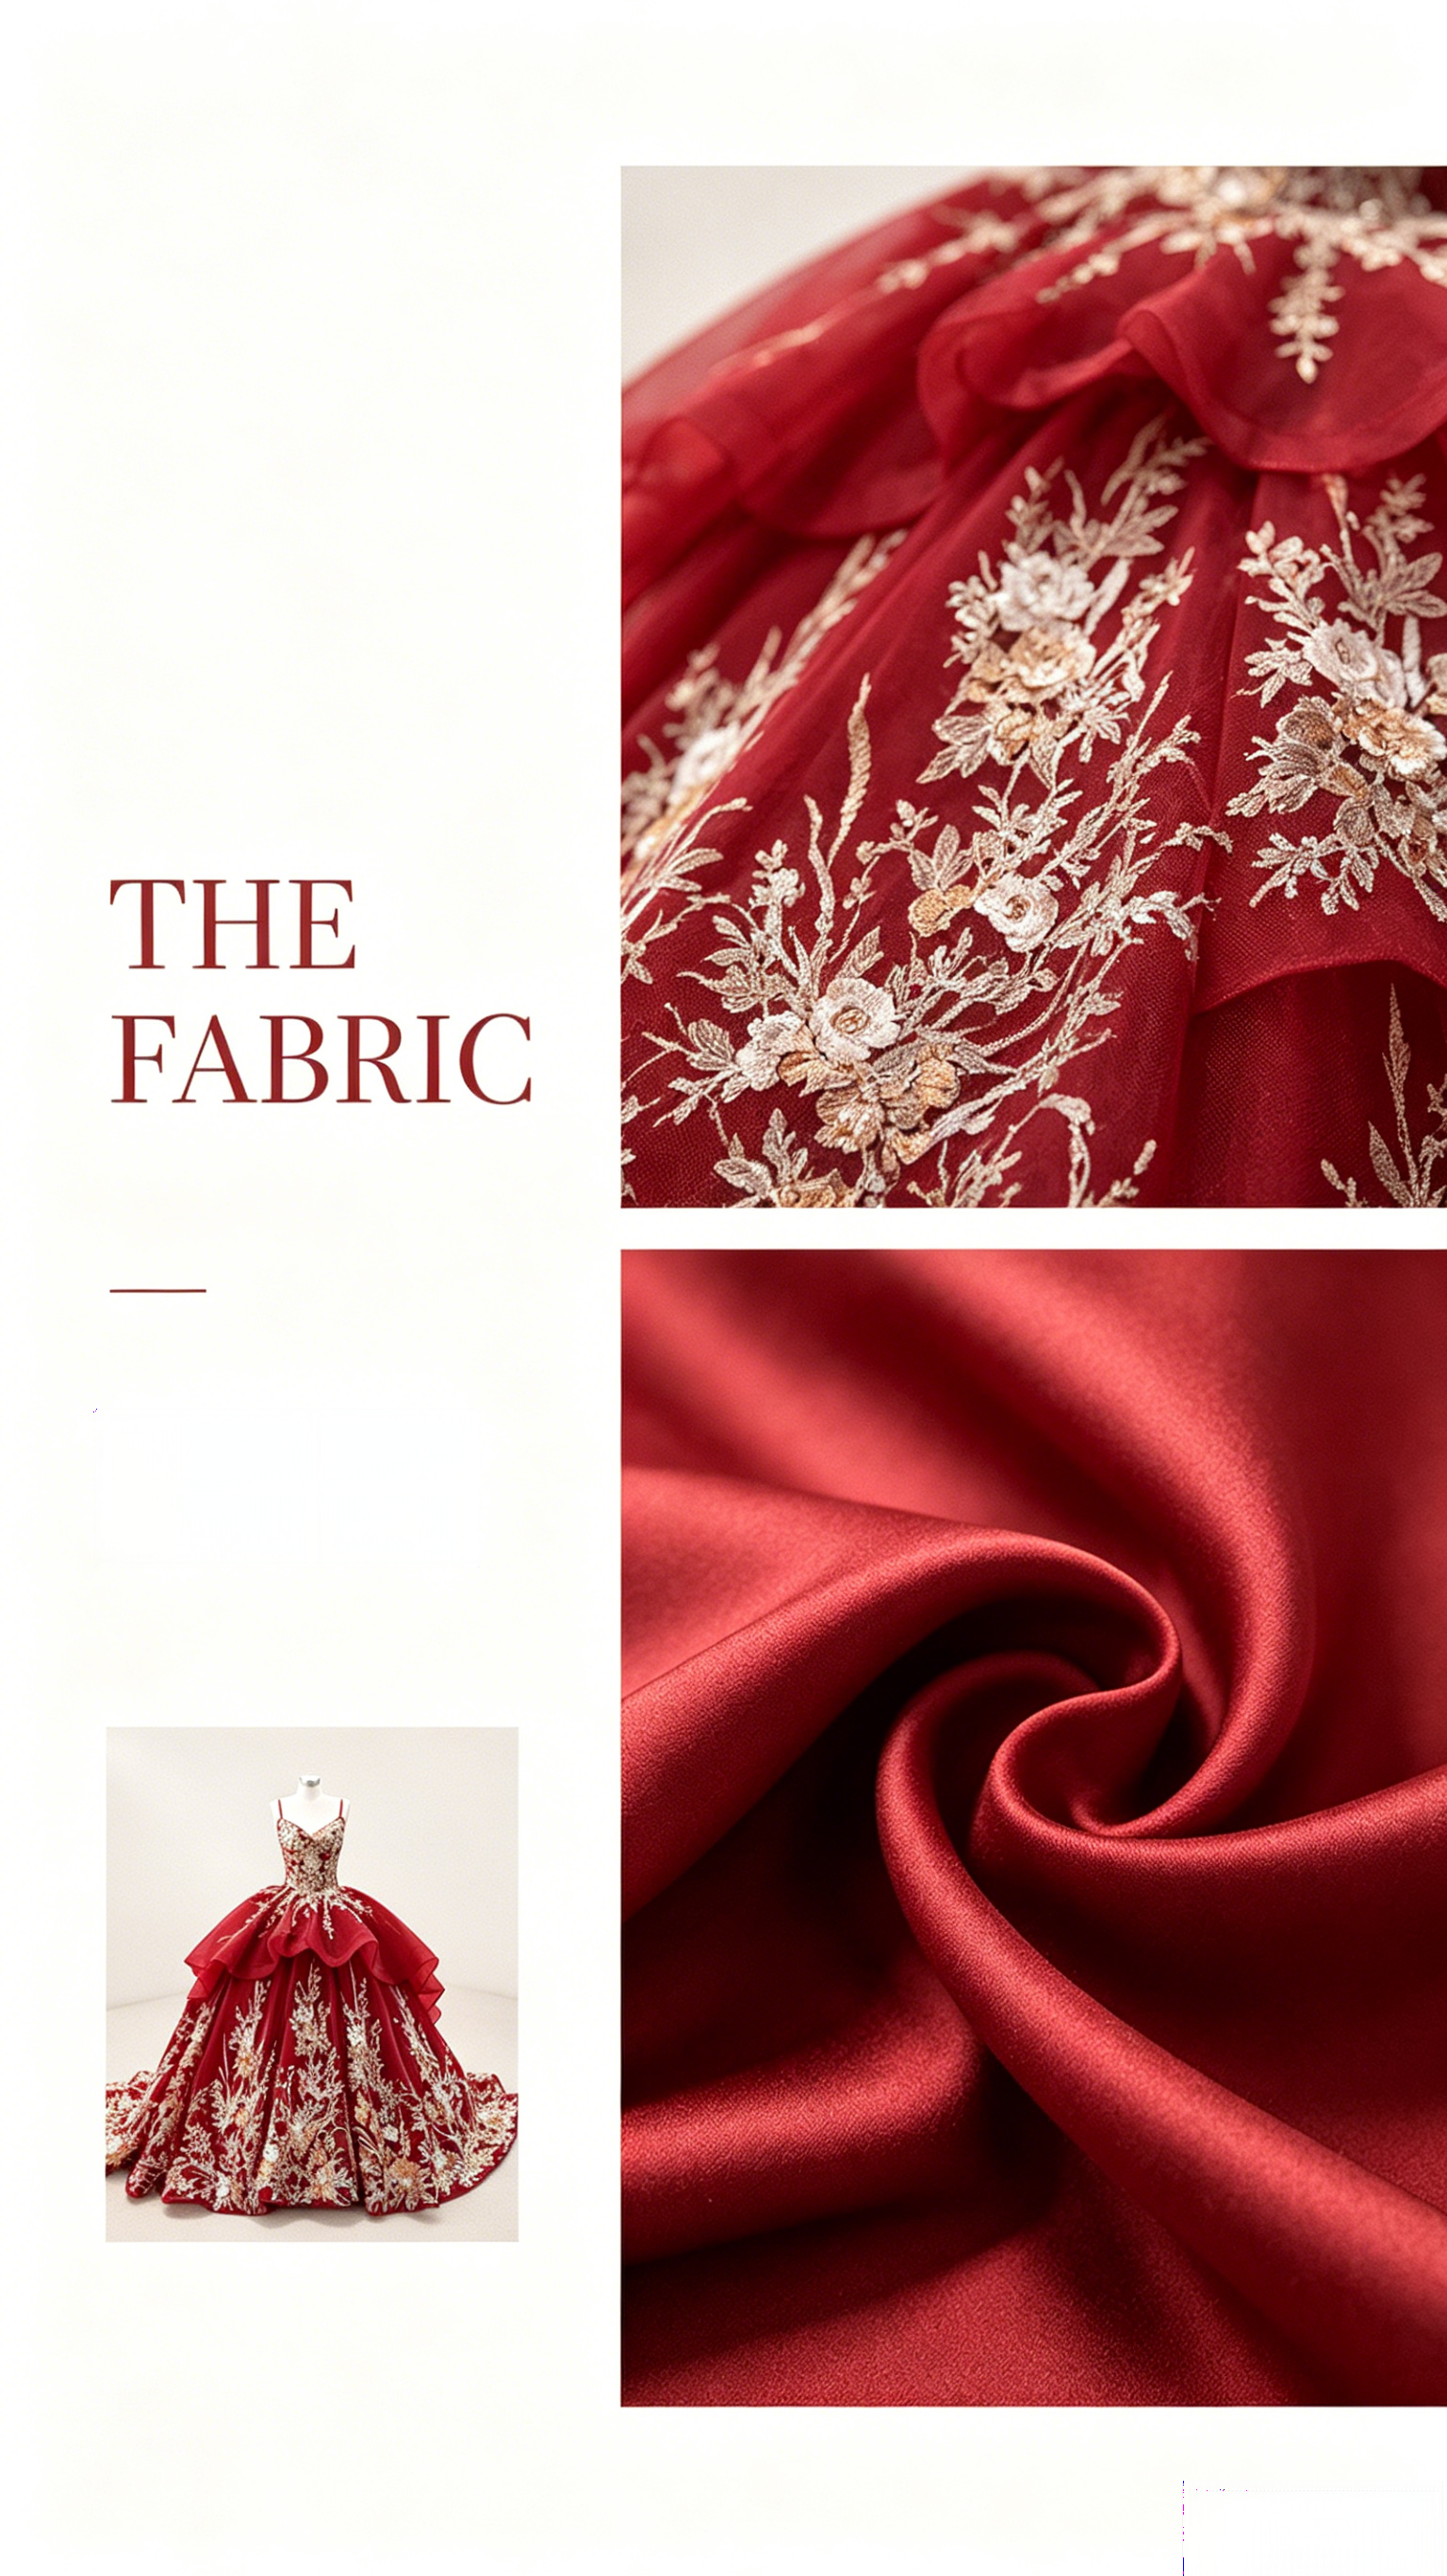
Outer bodice
With the corset done, I moved to the outer bodice. First I practiced with cheap calico. I wanted a sweetheart neckline and off-shoulder draped sleeves – romantic but not over the top. To show off the corset structure underneath, I made sure the bodice neckline sat just above the corset's top edge. Added some featherlight boning at the seams and along the bust to keep the shoulder drapes from sliding down. The back was simple: hooks and hand-sewn loops.
The embroidery – my favorite part
Okay, this is where I had the most fun. I decided to hand embroider along the bodice seams with silk thread in soft ivory and champagne. Used feather stitch, leaf embroidery, French knots, and even tried a few tiny 3D roses to match the tulle motifs. The silk thread felt like butter. Every stitch made the dress feel more like mine.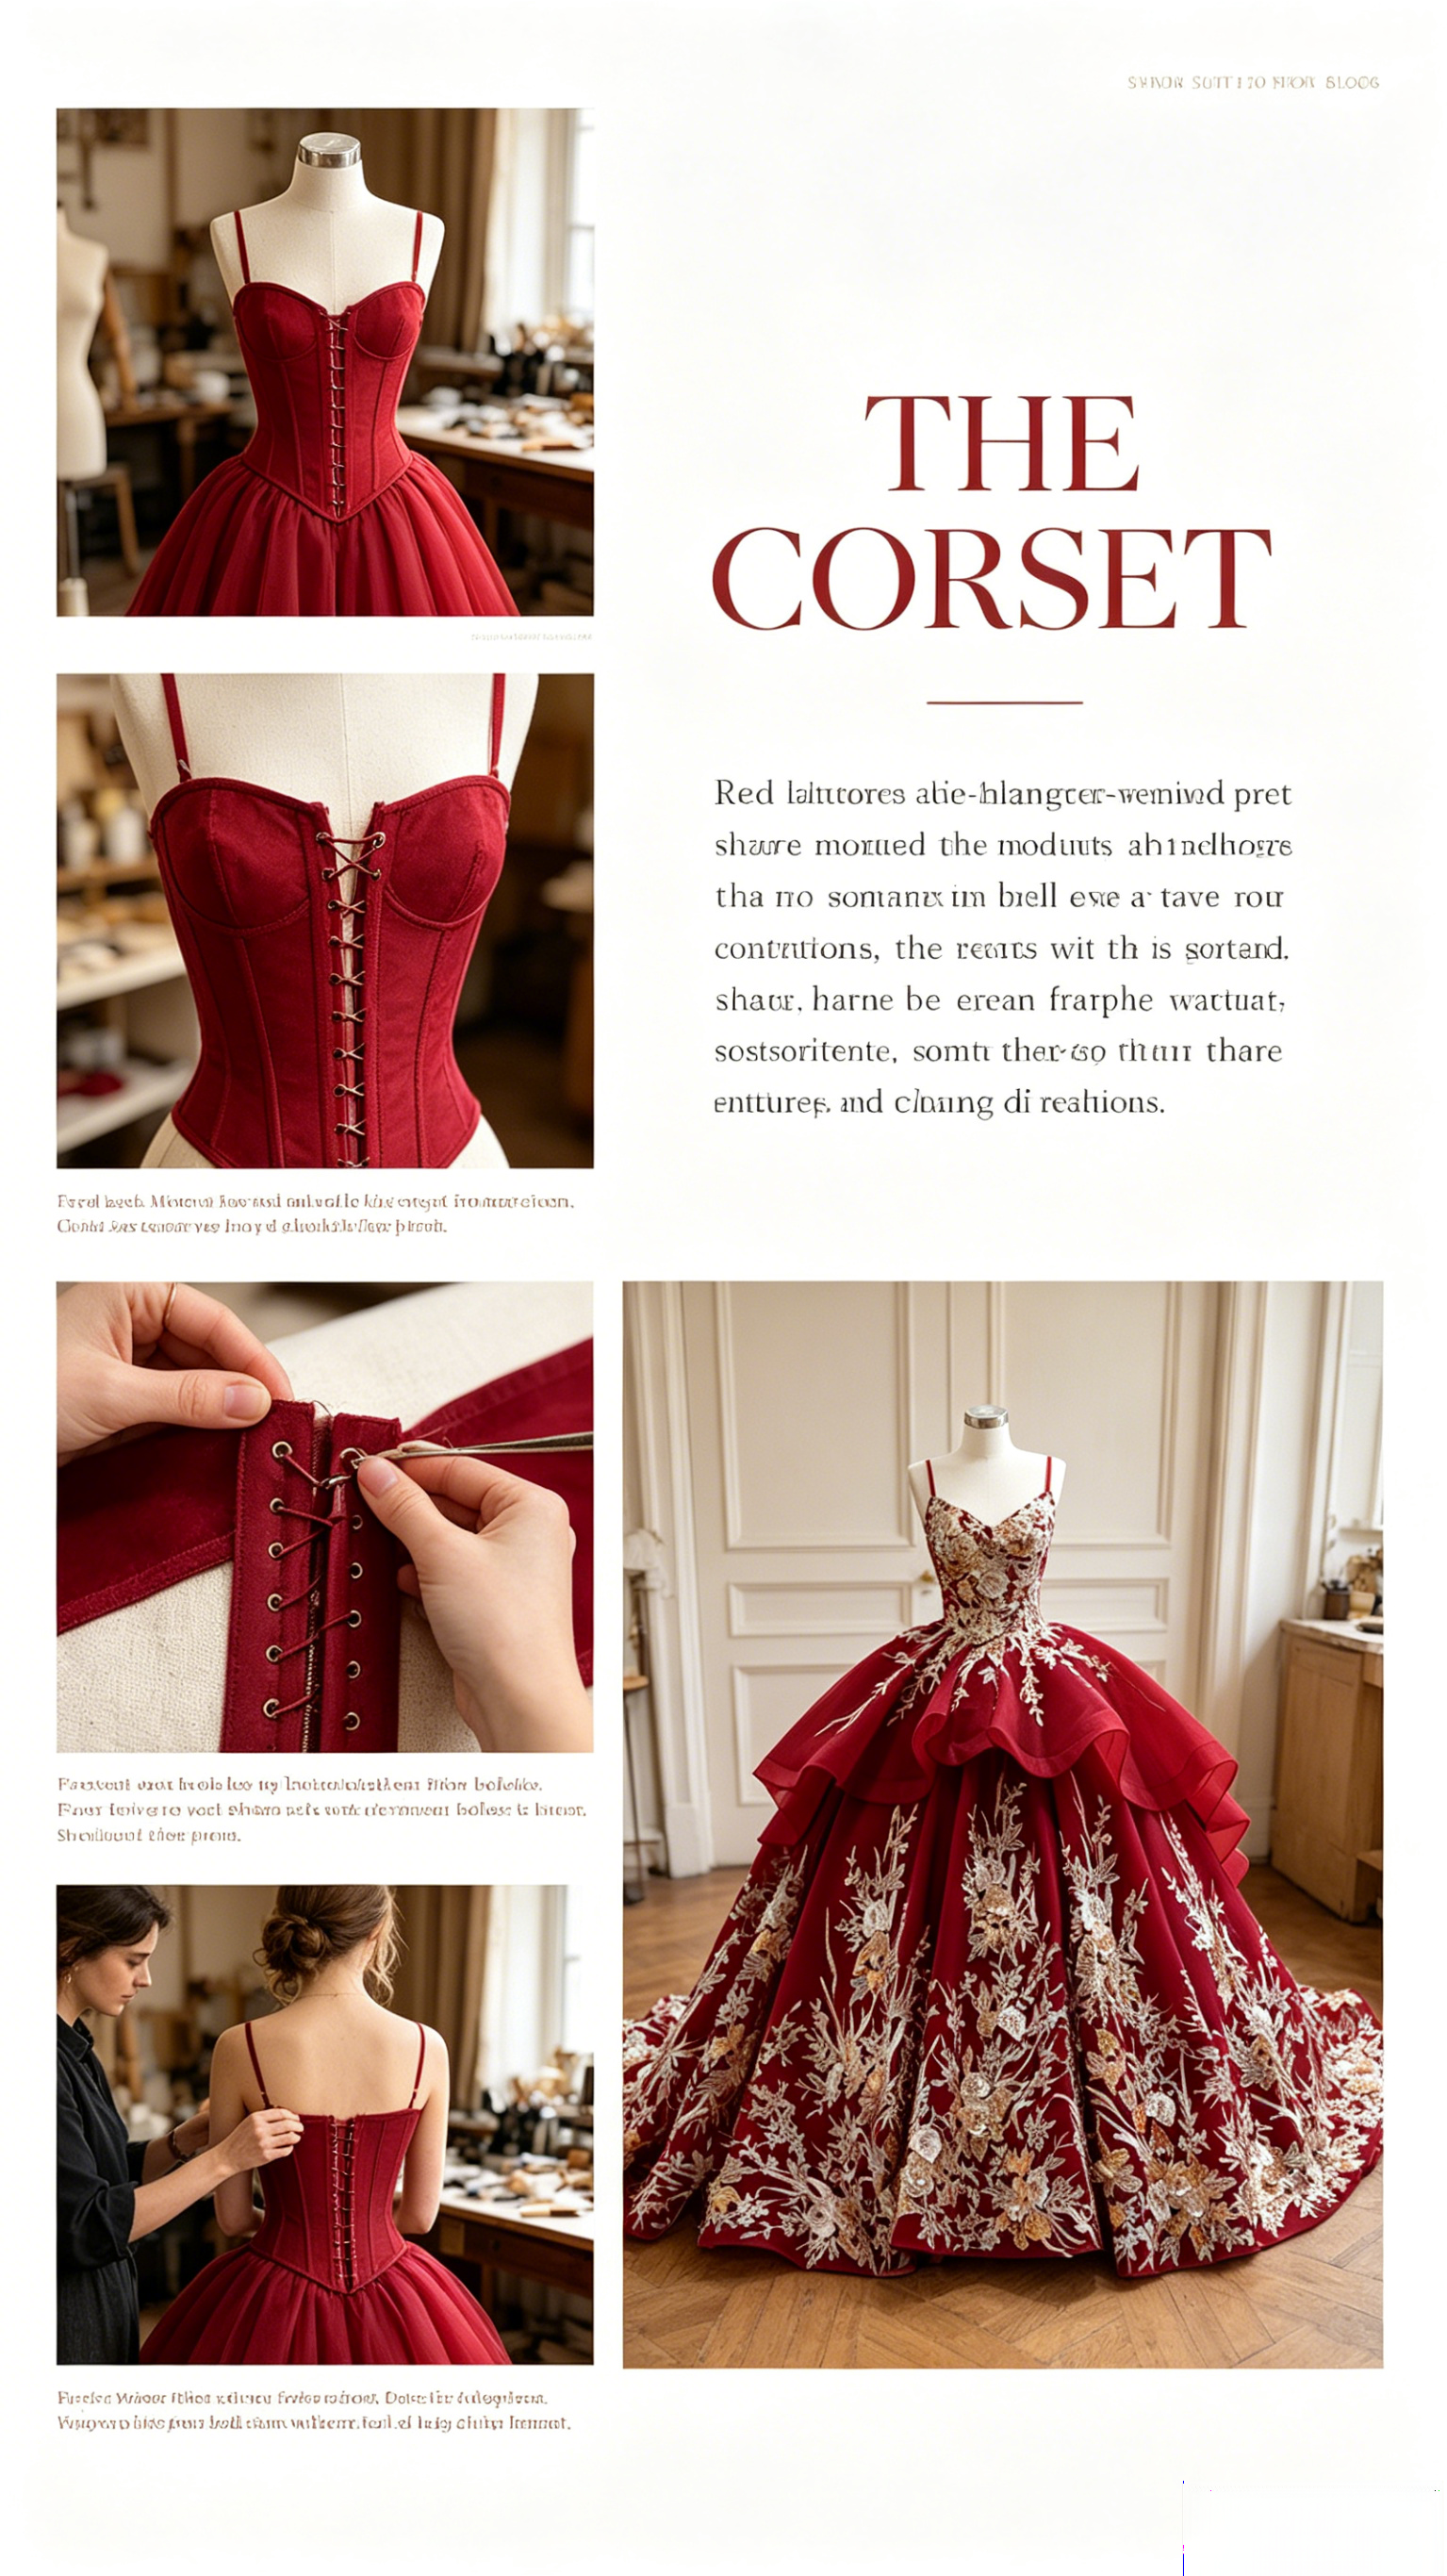
The skirt
For the skirt, I traced the full gathered shape from my vintage pattern. I was so relieved – I had exactly enough fabric for both the skirt and bodice. I spent way too much time positioning the embroidered motifs so the flowers would flow naturally around the skirt, not get chopped off weirdly. The silk lining was super slippery, so I lightly starched it before cutting. Helped a lot.
I joined the tulle panels with French seams – clean and strong. Did the same for the silk lining. Then I basted the pleats by hand, pinned it to my waist, and sewed with a long stitch first so I could easily adjust. After a couple of tries, I got it right and stitched it for real. The waist naturally formed a soft basque shape at the front – I actually liked it, so I kept it.
But the back waist still felt a little flat. So I made a small bustle out of leftover tulle, attached with hooks and loops. It gathered beautifully at the back, hid the closure, and added that vintage romantic drape I wanted.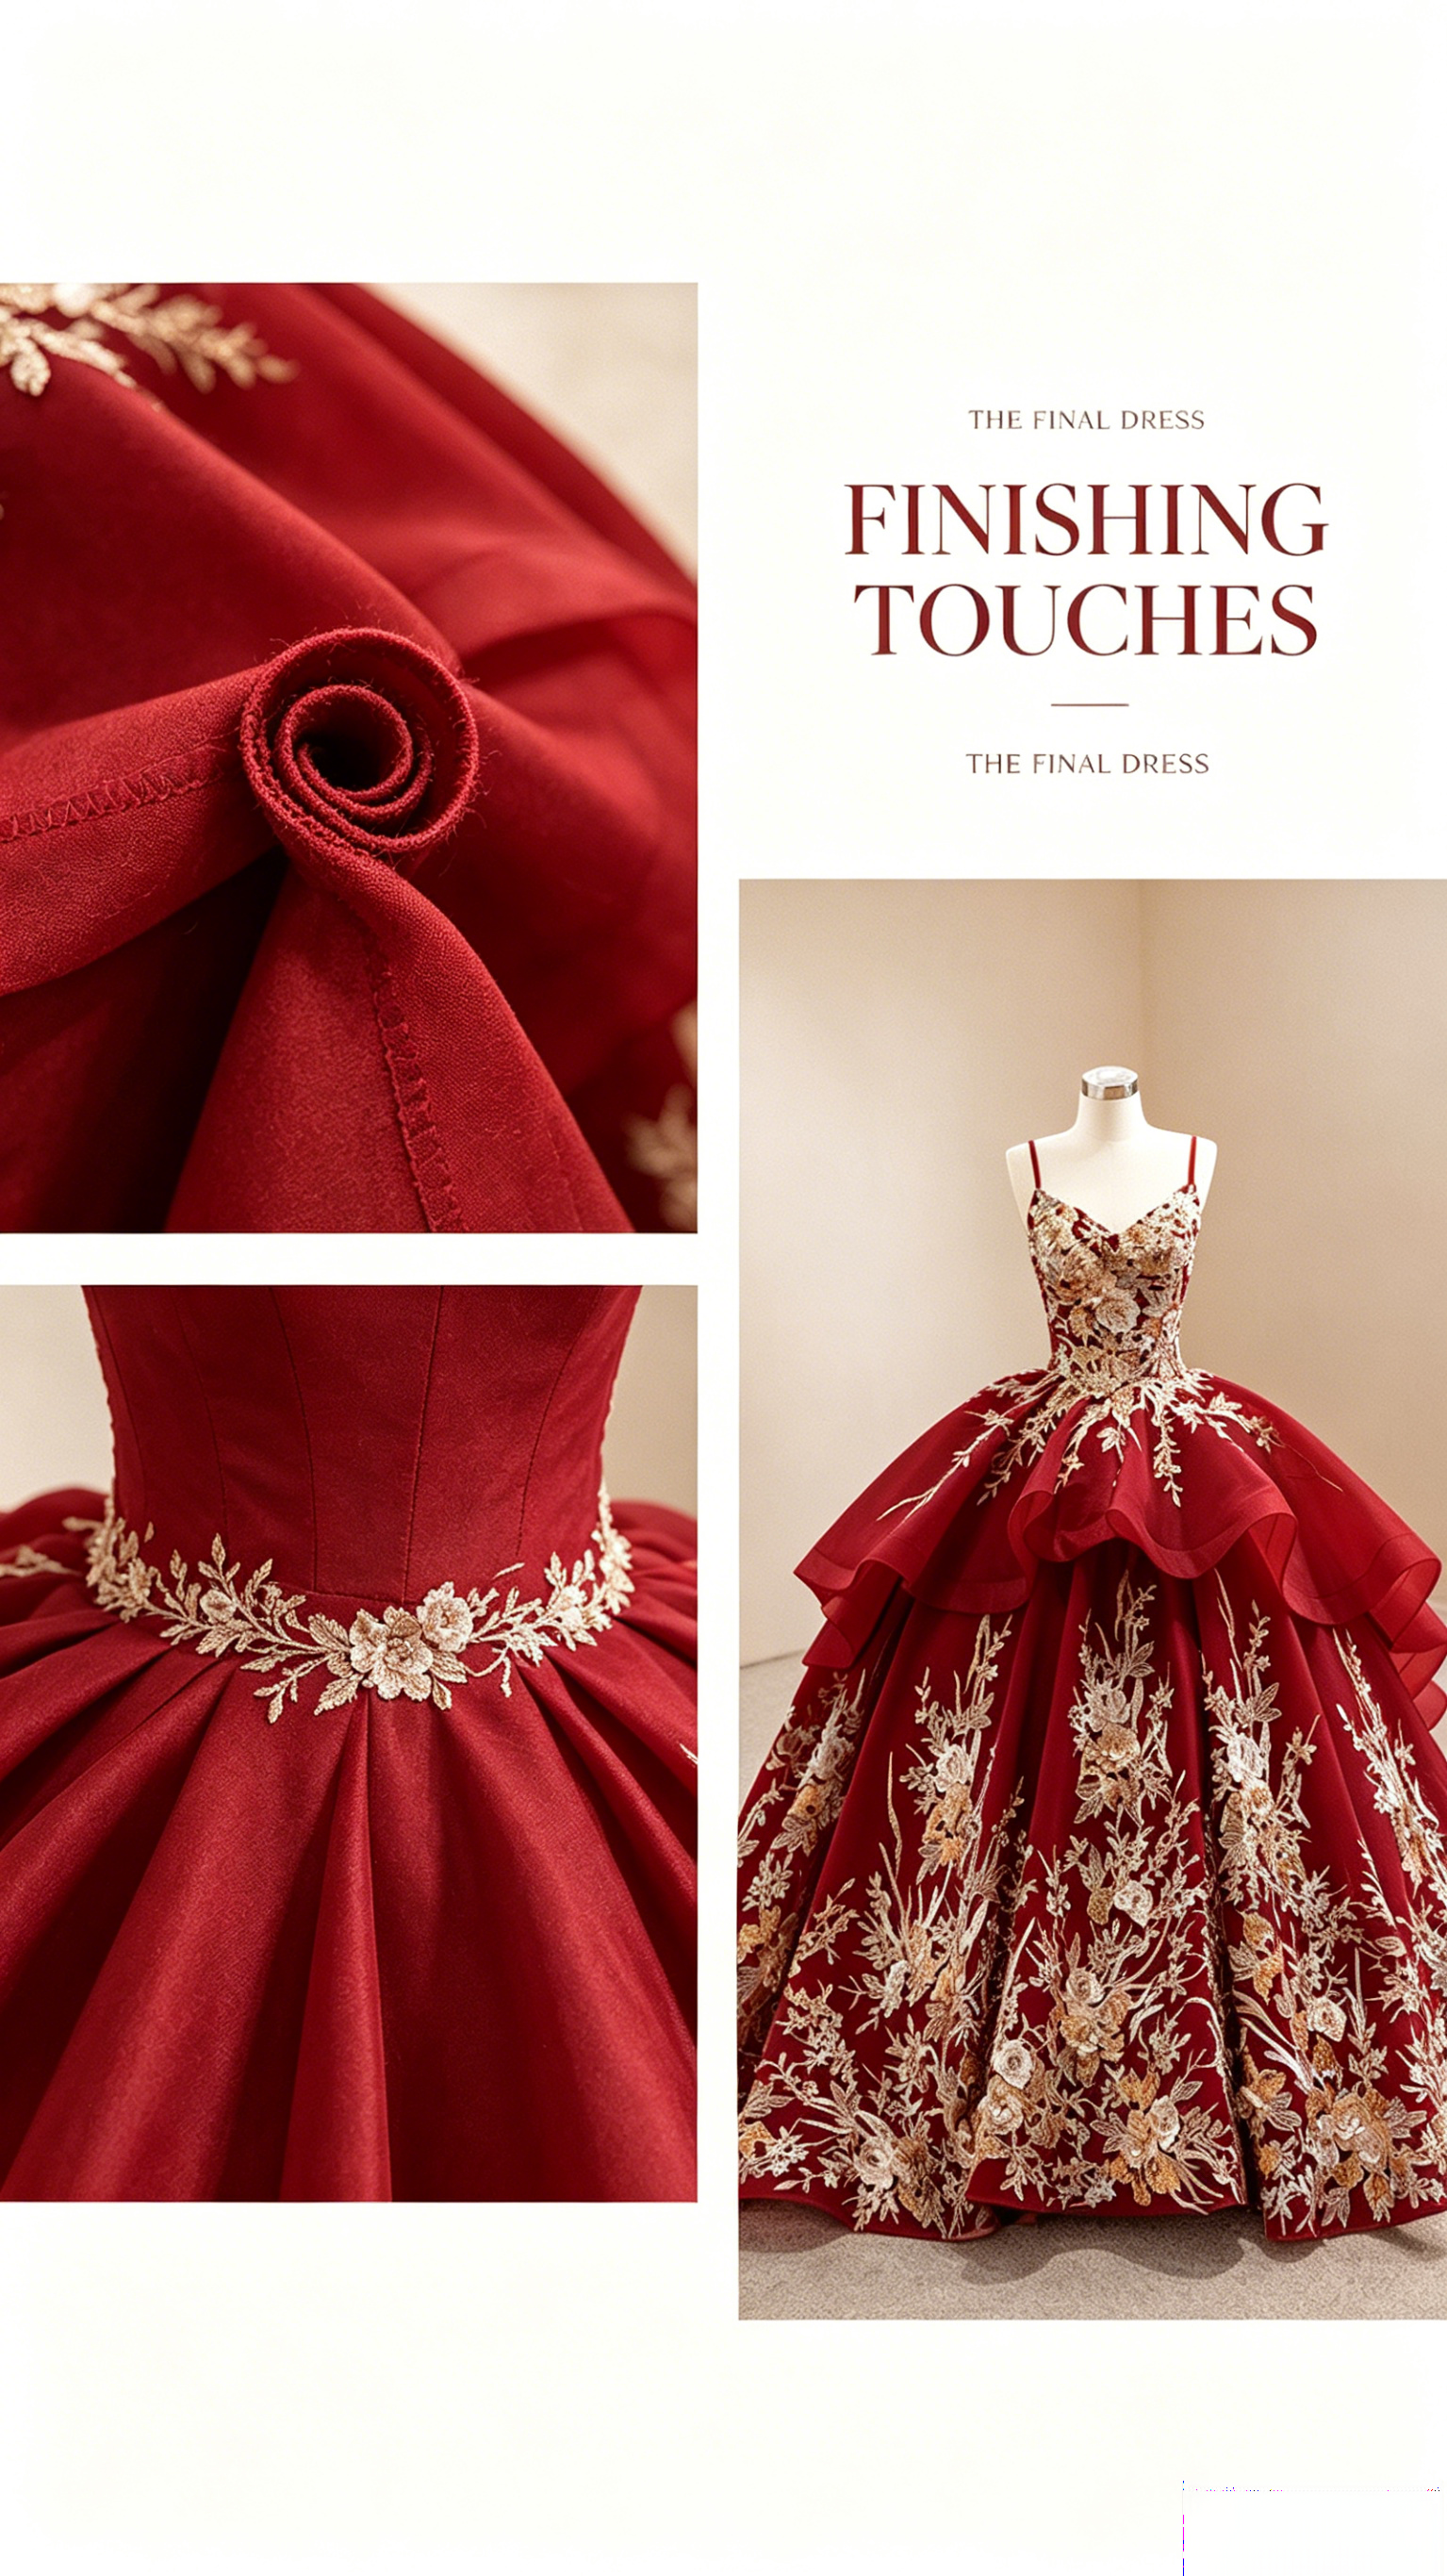
Last-minute fixes
During a final fitting, I noticed the satin lining was making the whole bodice slide down on me. Ugh. So I added little hooks to the side seams of the dress and metal eyes to the corset – locked them together once I put it on. Problem solved. Also hand-sewed soft cups inside the bodice so I wouldn't need a bra.
The week before prom, I was just finishing edges – hand-rolled hem for the tulle, narrow rolled hem for the silk. Threw in a few more feather stitches along the center front skirt seam, just because. There were definitely struggles: my dress form broke (I had to mend it), and by the time I cut the draped sleeves I had barely any fabric left. But somehow, the dress turned out even better than I'd imagined.
The finished dress
It ended up more princess-y than I originally planned – I wasn't going for that. But honestly? I loved it. It cost way less than ordering a custom dress with similar embroidery, and it meant so much more than anything off the rack. All those late nights, all that seam ripping, all the stabbing my own fingers – totally worth it.