

Red Beaded Pleat Gown: Hand-Sewn Detail, Sculpted Satin and a Detachable Train
1st Oct 2026
KEMEDRESS WORKROOM
From Flat Beadwork to Sculpted Pleats
A closer look at the construction of a red satin mermaid gown, where hand-sewn embellishment is completed before the fabric is shaped into its final folds.
By Kemedress Workshop · Published · Updated
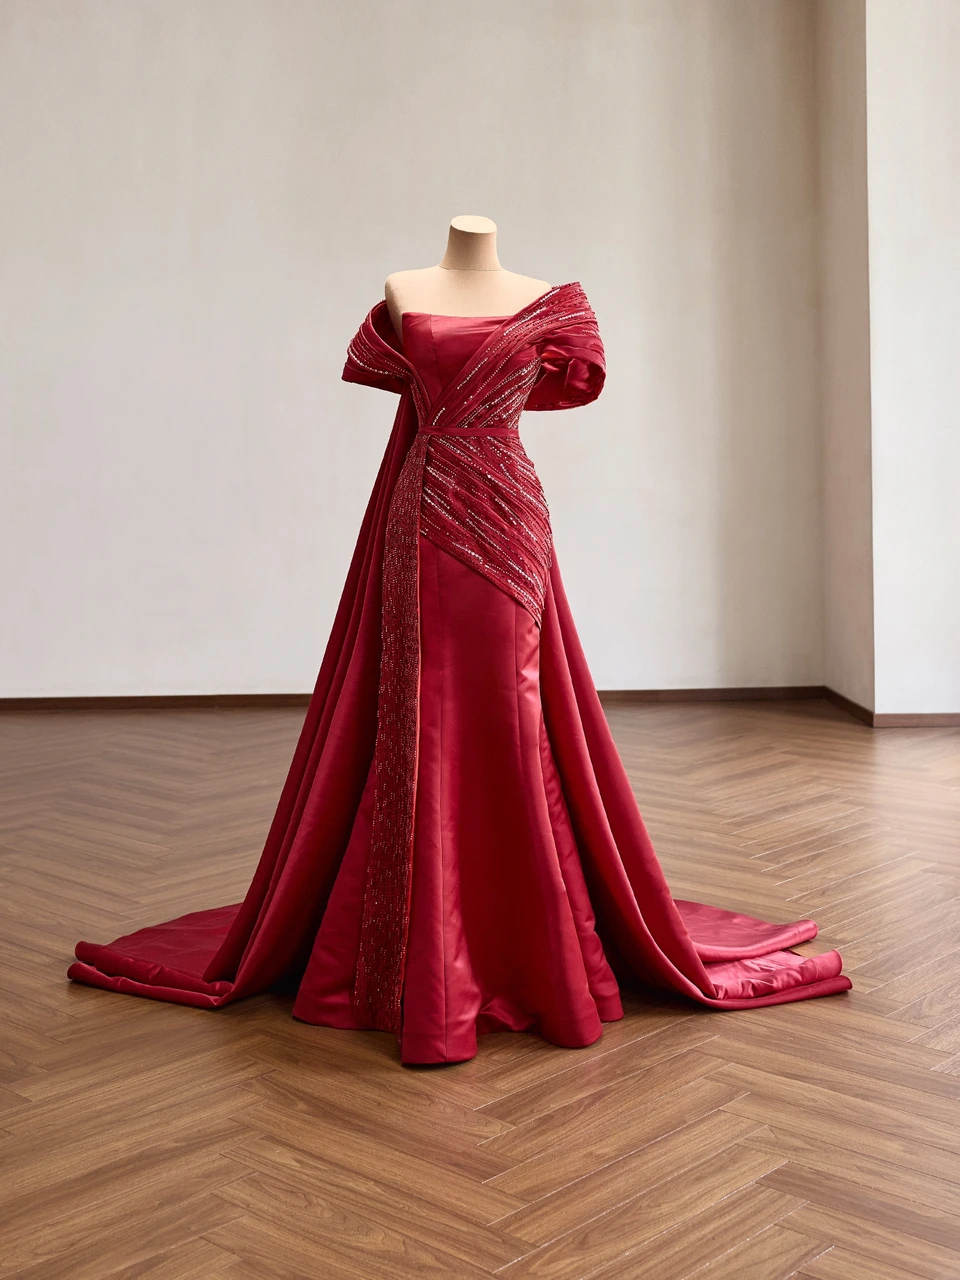
One Construction Decision Shapes the Whole Gown
The most important question during development was simple: should the fabric be beaded first and pleated afterward, or should the pleats be formed before the embellishment is added?
Both approaches were tested on early samples. For this gown, the final construction begins with the satin panel lying flat while the beadwork is completed by hand. Only after the surface is finished does the panel move to the dress form for sculpting.
That sequence affects the alignment of the beadwork, the handling of the fabric and the way light moves across the finished pleats.
01 / DEVELOPMENT
Muslin Establishes the Shape
Before the final satin comes near the form, the bodice is developed in cotton muslin. Seam lines are marked, pinned sections are adjusted and the shoulder shape is tested before the final fabric is cut.
The wide folded shoulder is particularly sensitive to small changes in proportion. Testing it in a temporary satin scrap helps establish the intended line before the final material is committed. The paper pattern is prepared after the muslin has been approved.
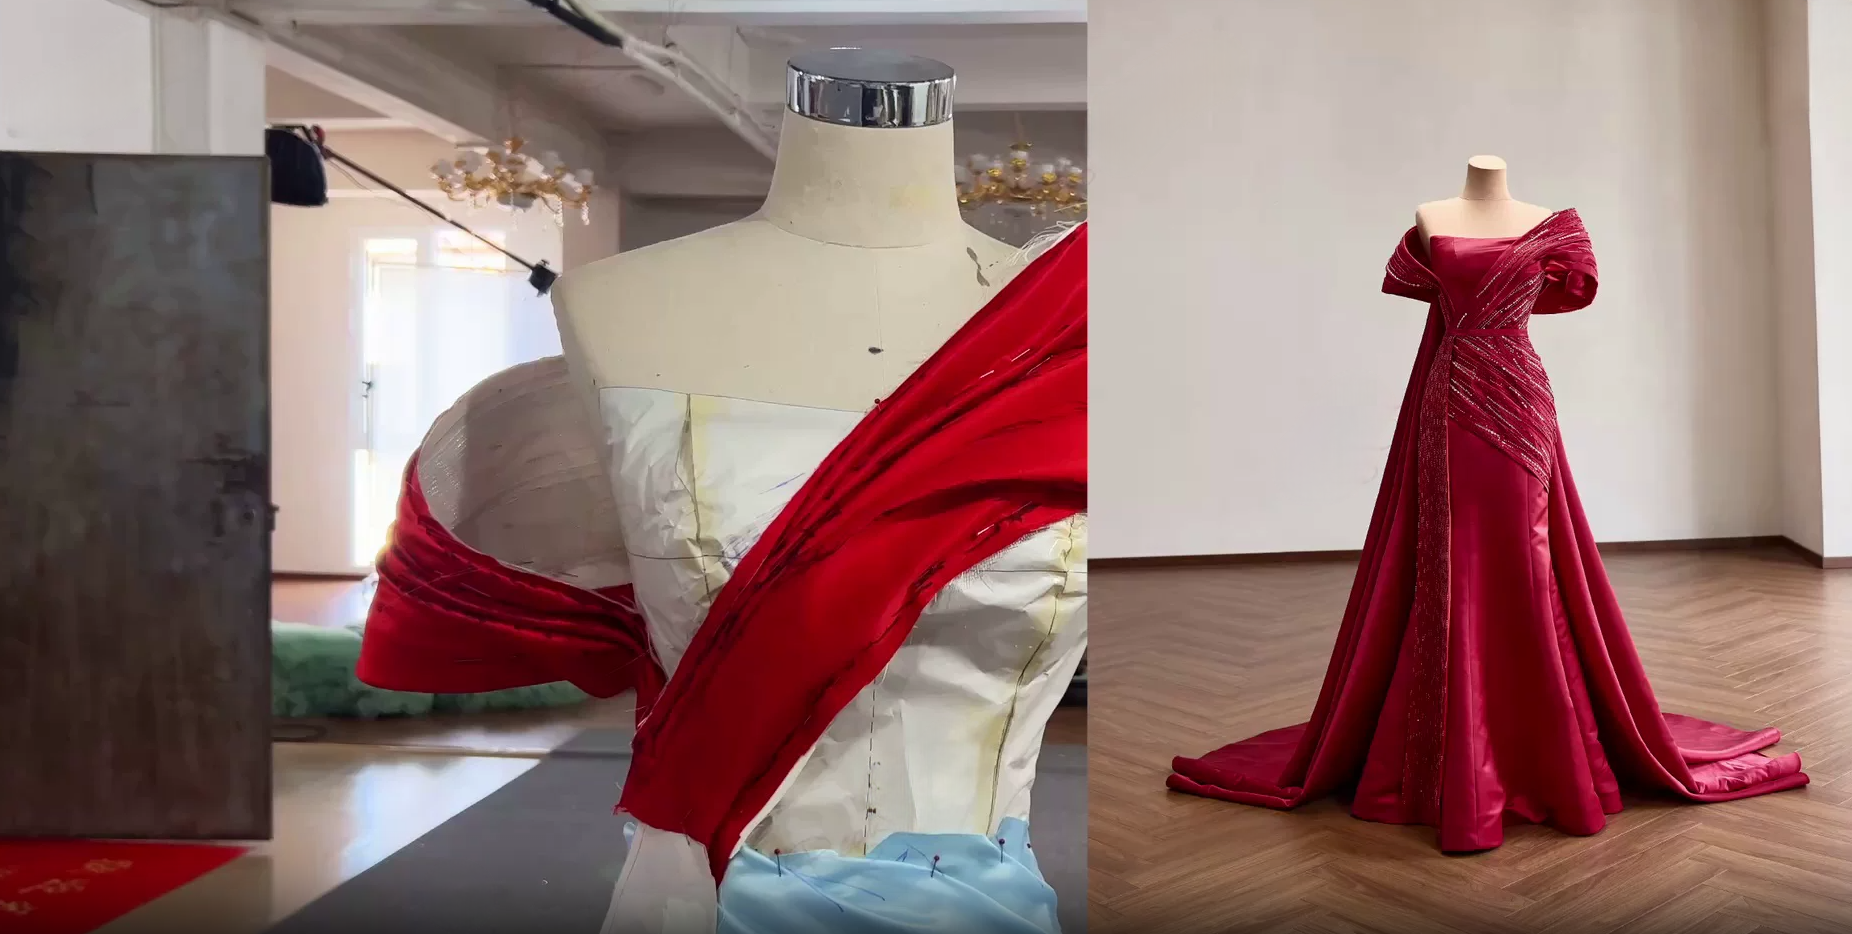
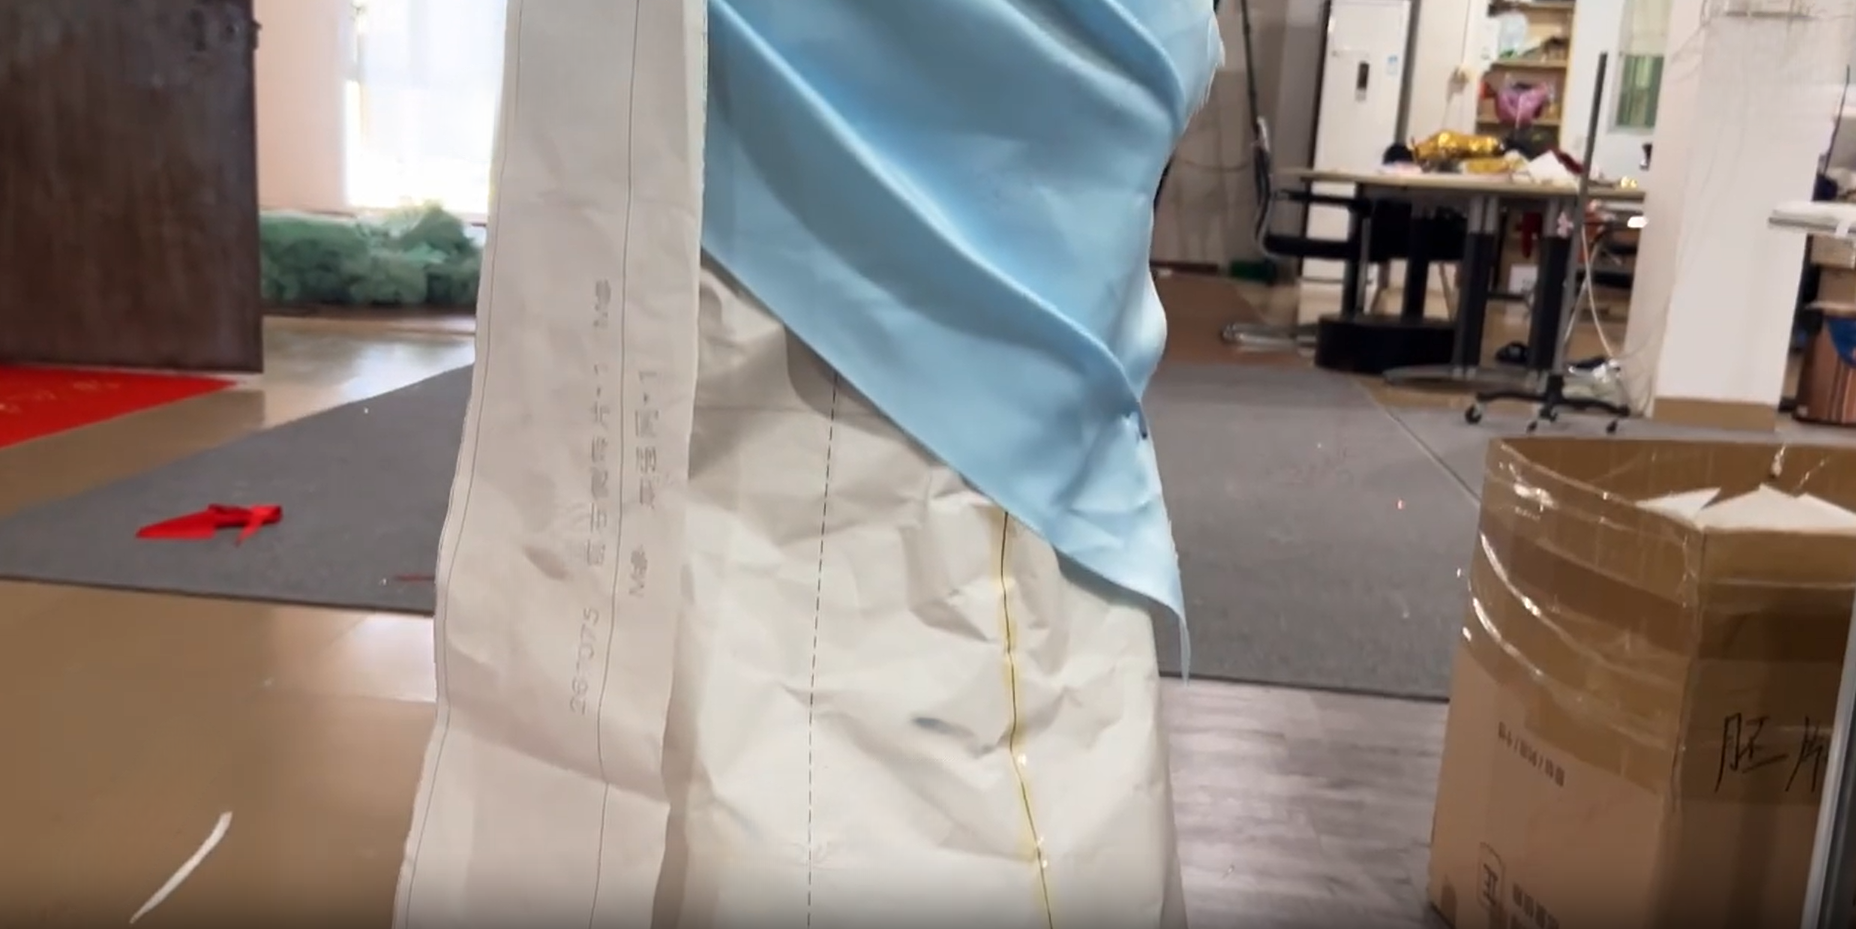
The early fitting stage determines where the final fabric will sit before embellishment and pleating make later adjustments more difficult.
02 / SUPPORT
The Shape Needs an Internal Foundation
A strapless bodice carrying substantial hand beadwork needs more than an outer satin shell. The foundation underneath provides the stability required to keep the fitted shape in place during wear.
A stiff open-weave crinoline is stitched into the construction, while boning channels run through the interior seams. The support remains hidden beneath the finished surface, but it controls the shape of the bodice and gives the outer fabric a stable base.
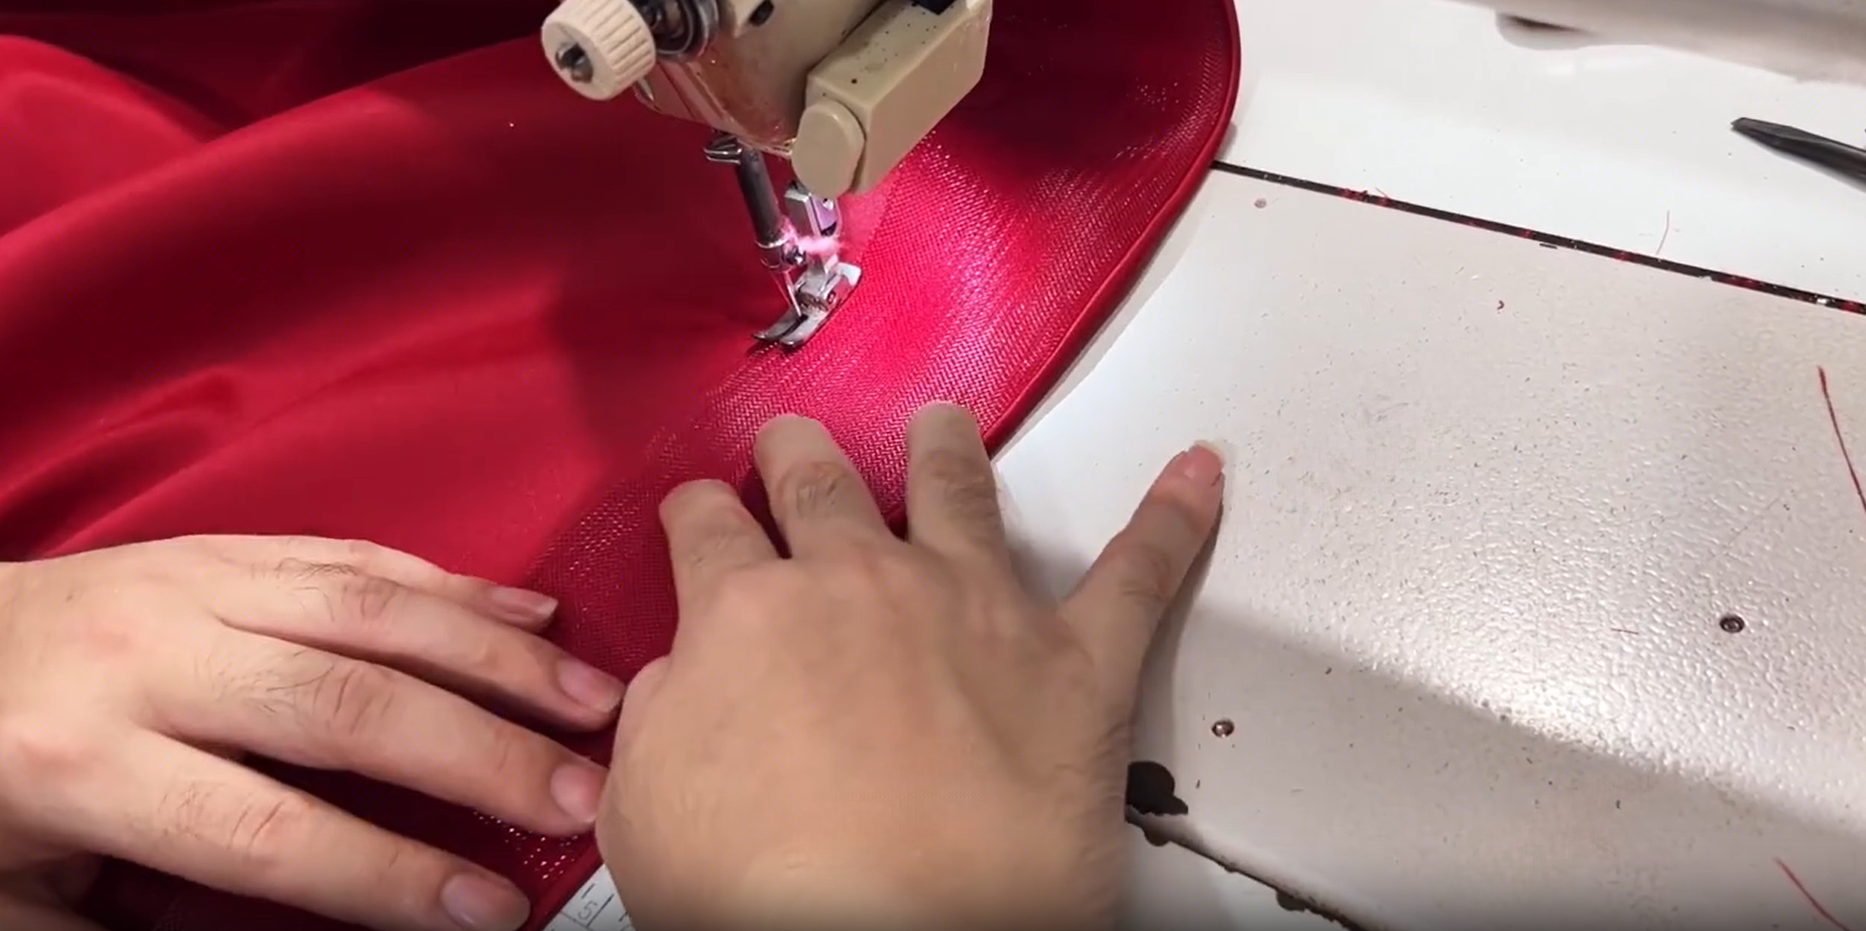
This hidden structure is especially important when fitted satin, boning and dimensional embellishment all have to work together.
03 / HAND WORK
The Surface Is Finished While It Is Still Flat
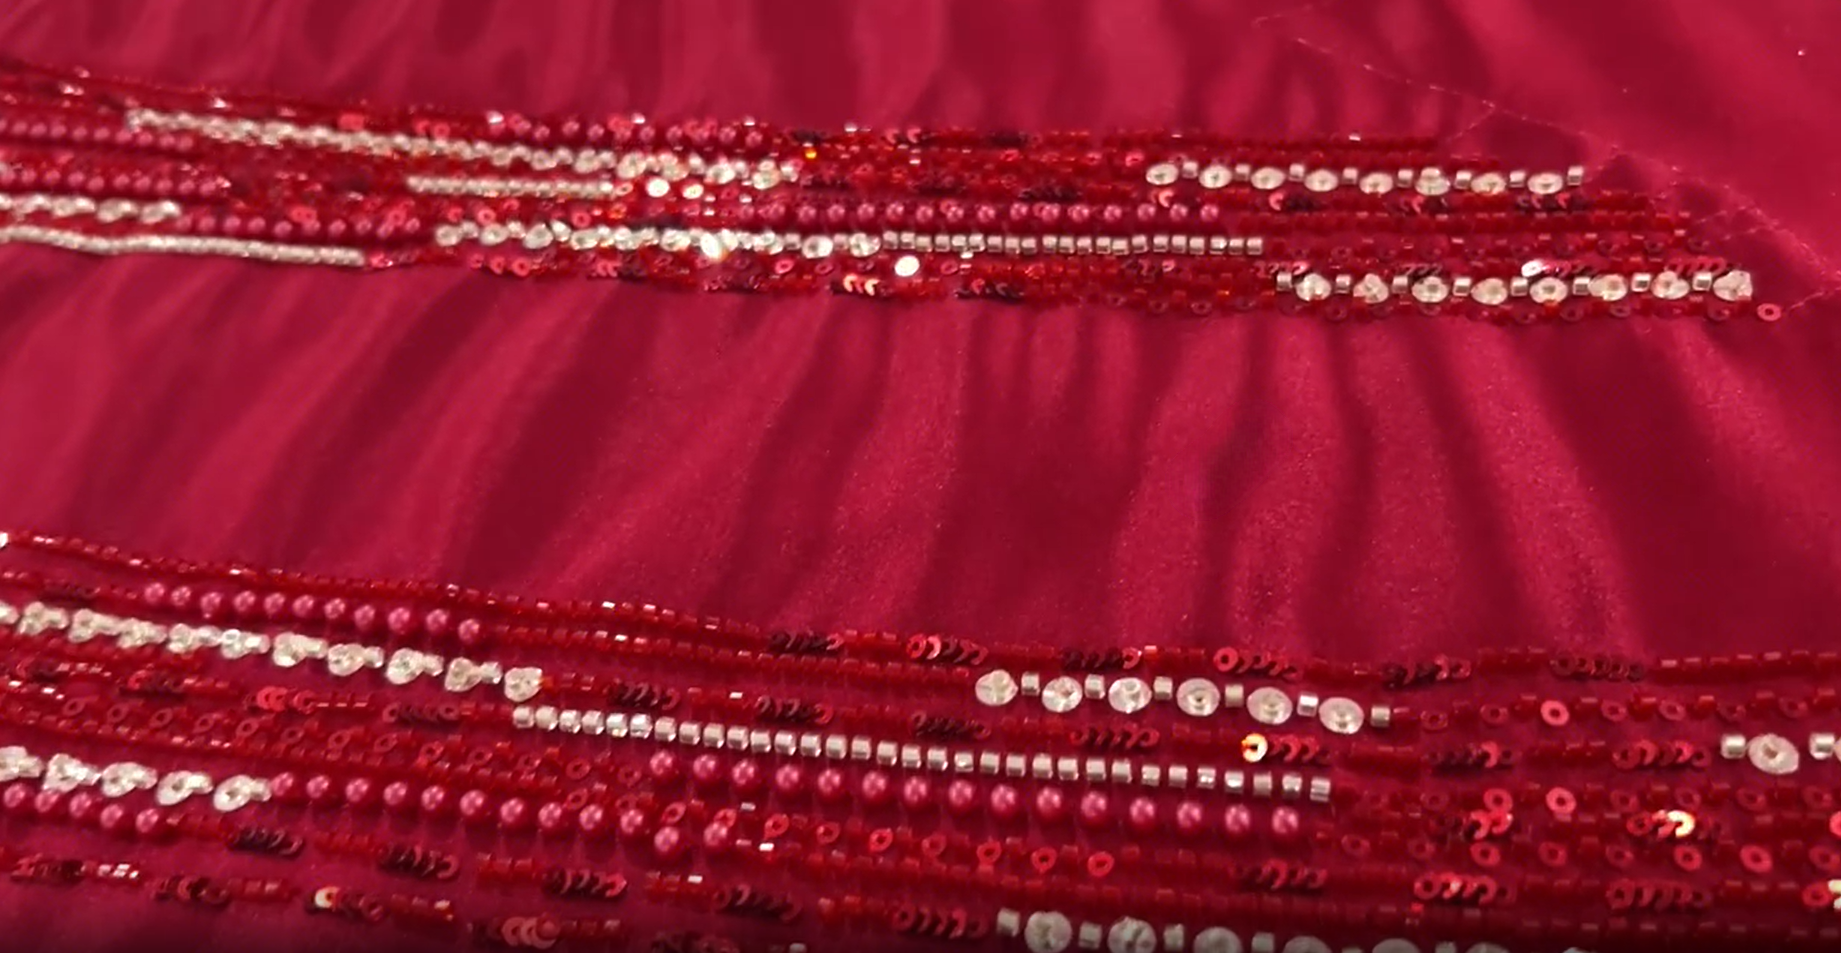
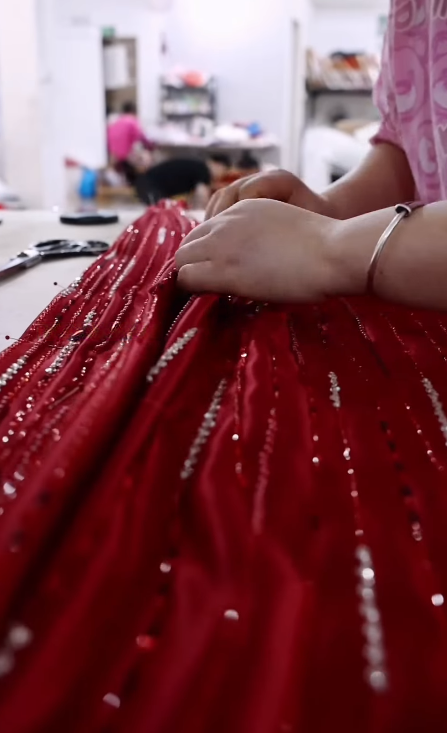
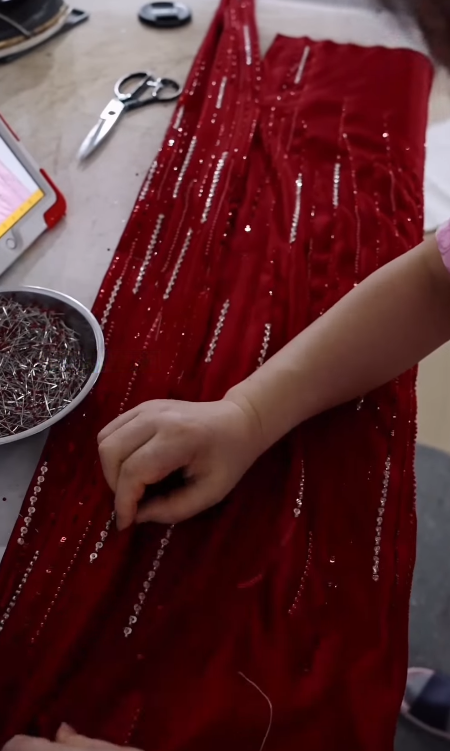
The satin panel remains flat on the worktable throughout the beading stage. Diagonal rows are stitched by hand, combining red glass beads, clear and silver faceted crystals, red sequins, silver cupped sequins and small silver cube beads.
Each row is secured at the ends, and the work is carried out under a daylight lamp so the spacing and alignment can be checked as the surface develops. A single bodice panel can take well over a day before it is ready for shaping.
THE KEY CONSTRUCTION DECISION
BEAD FIRST
then shape the pleats
Keeping the fabric flat gives the beader a stable surface. Both hands remain free, the rows can be checked for parallel alignment and the stitches are not being pulled around a moving fold.
Earlier samples showed why the sequence matters. When embellishment was added after the pleats were formed, threads and crystals were harder to control and some bead rows became compressed inside the folds. On this gown, completing the surface first allows the embellishment to move with the finished ridges and hollows.
04 / DRAPING
Flat Beadwork Becomes Sculpted Pleats
Once the panel is fully embellished, it moves onto the dress form over the boned foundation. The excess underlayer is trimmed carefully before the beaded surface is gathered, twisted and folded into diagonal pleats.
The folds travel from the waist around the body toward the shoulder. They are shaped by hand and held with corsage pins placed between the beaded rows. A pin must avoid the embellishment itself so that the beads and their threads remain protected during fitting.
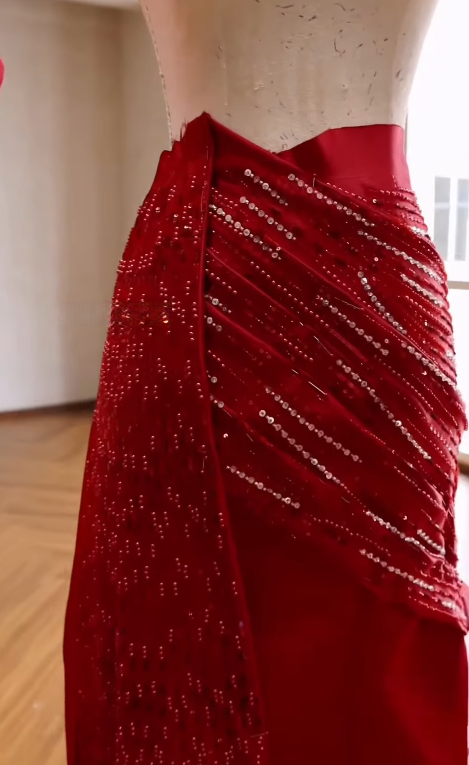
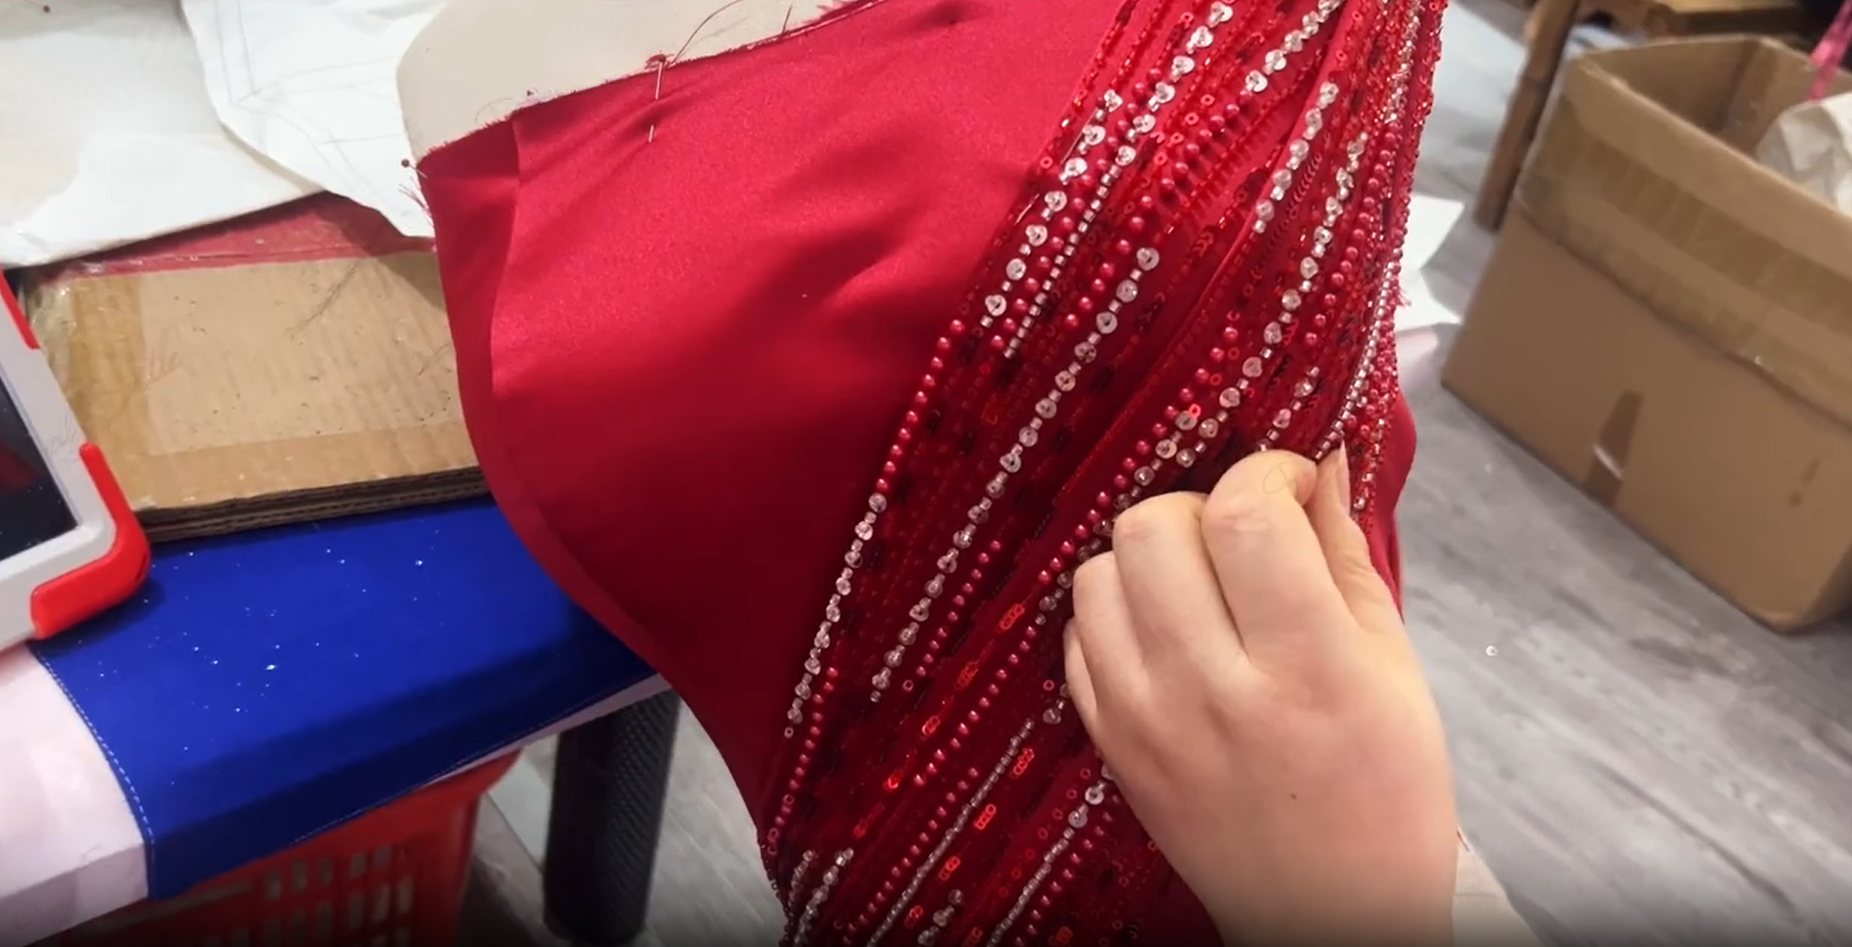
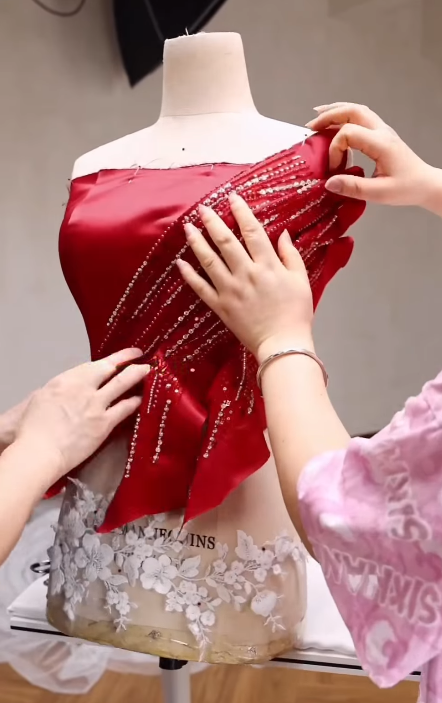
The pinning is repeated until the folds fall correctly. A section may be shaped, inspected, released and rebuilt several times before the proportions settle into place.
Because the beadwork is already finished, the embellishment follows the outer ridges of the pleats. As light travels across the gown, crystals and sequins sit at different depths, giving the surface a changing dimensional quality.
05 / NECKLINE
The Shoulder Line Is Draped on the Form
The wide folded band around the shoulders is not treated as a simple flat strip. The fabric is draped directly on the form and folded into layered rolls until the inner edge follows the collarbone while the outer edge lifts slightly away from the body.
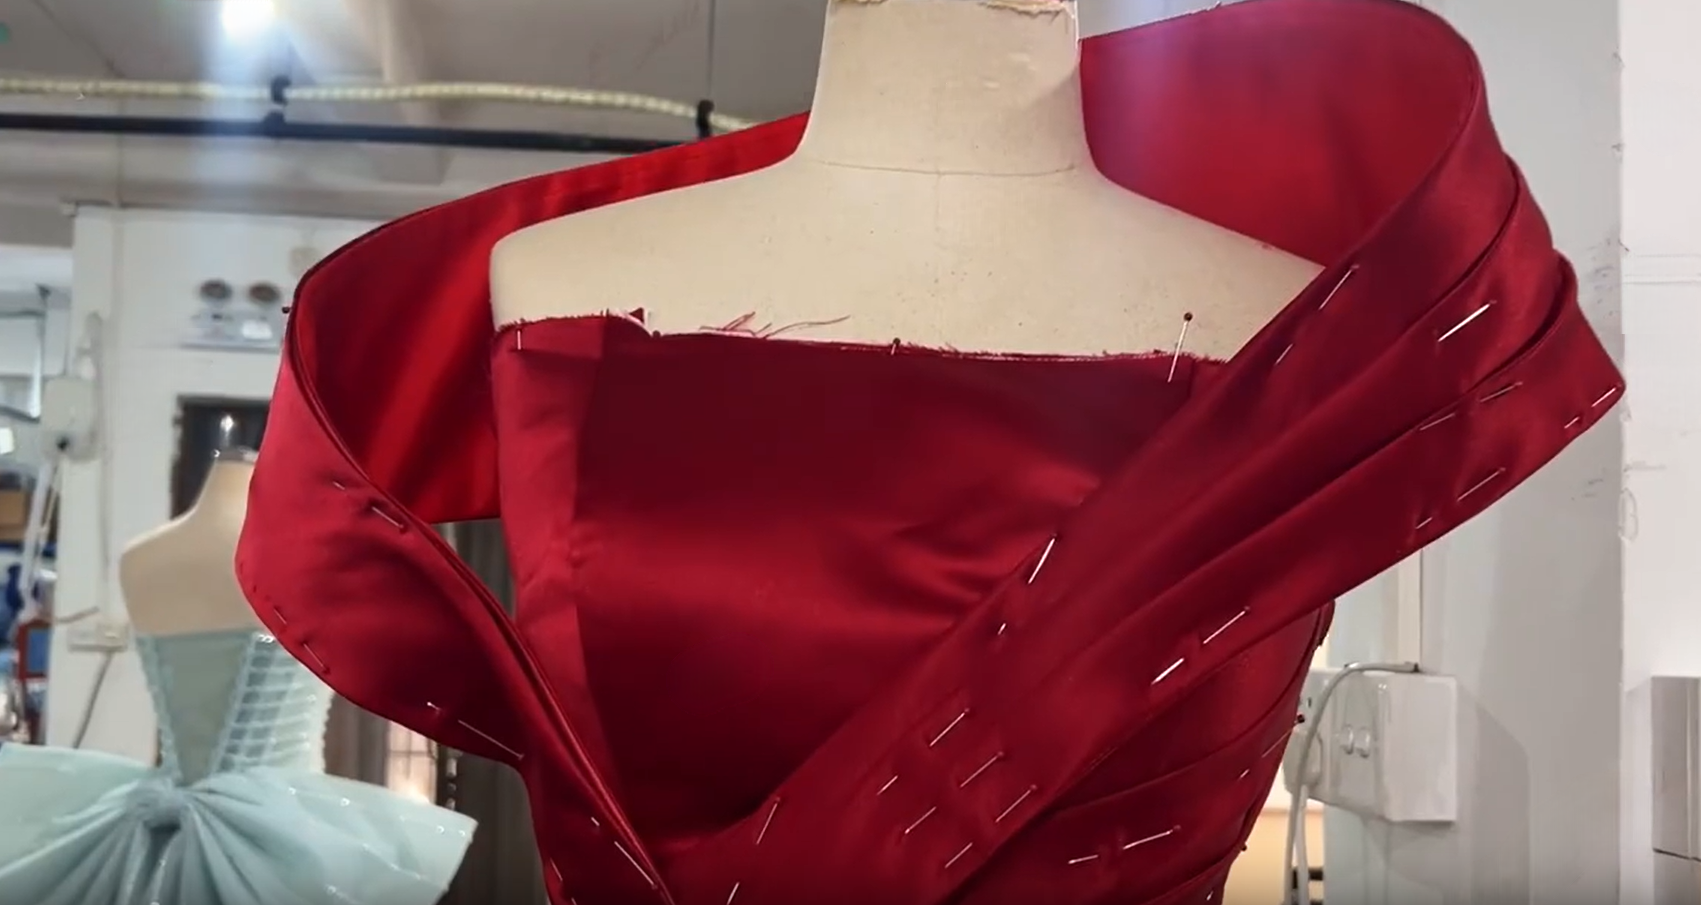
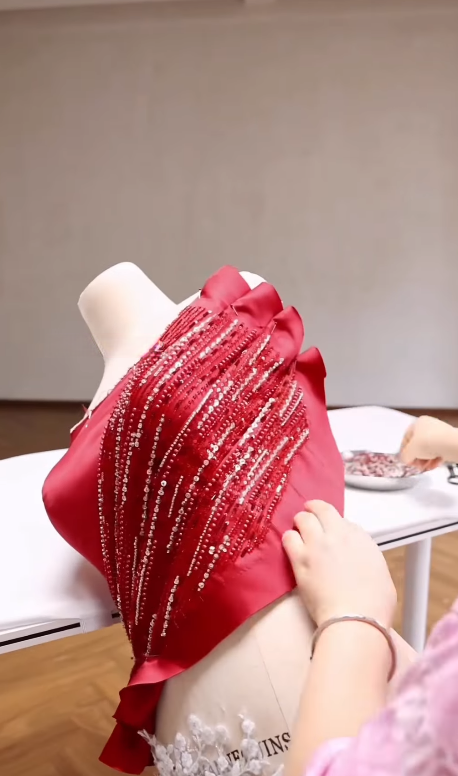
The shoulder and neckline folds are refined together so the upper edge feels connected to the bodice rather than added as a separate decorative band.
06 / FINISHING
One Gown, Two Silhouettes
After the draping is approved, the pieces come off the form and are stitched along the established lines. The pleats are hand-tacked from the inside so the anchoring stitches remain hidden beneath the beaded surface.
The skirt follows a fitted mermaid cut through the hip and knee before opening into a wider sweep. The train is developed from its own separate pattern rather than being permanently attached to the skirt.
Covered hooks and snaps are concealed along the waist seam beneath the pleated panel. With the train attached, the gown has a more formal extended silhouette. Without it, the fitted dress has a cleaner outline and more freedom of movement for a reception or dancing.
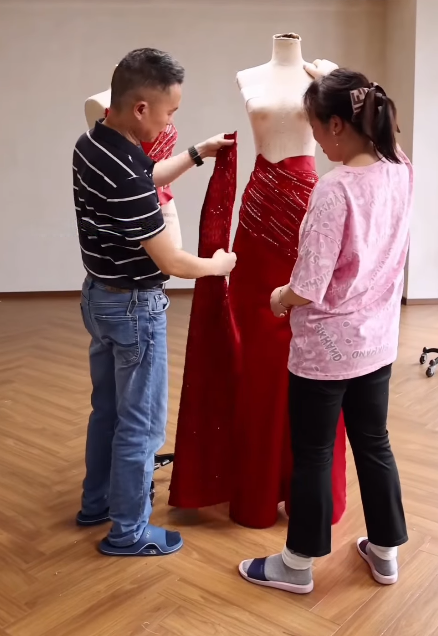
The construction therefore allows the same gown to move from a formal entrance to a lighter reception silhouette without changing the main dress.
THE FINISHED GOWN
The Red Beaded Mermaid Gown
The finished views bring together the decisions made in the workroom: internal support, flat-panel beadwork, sculpted satin folds and a detachable train.

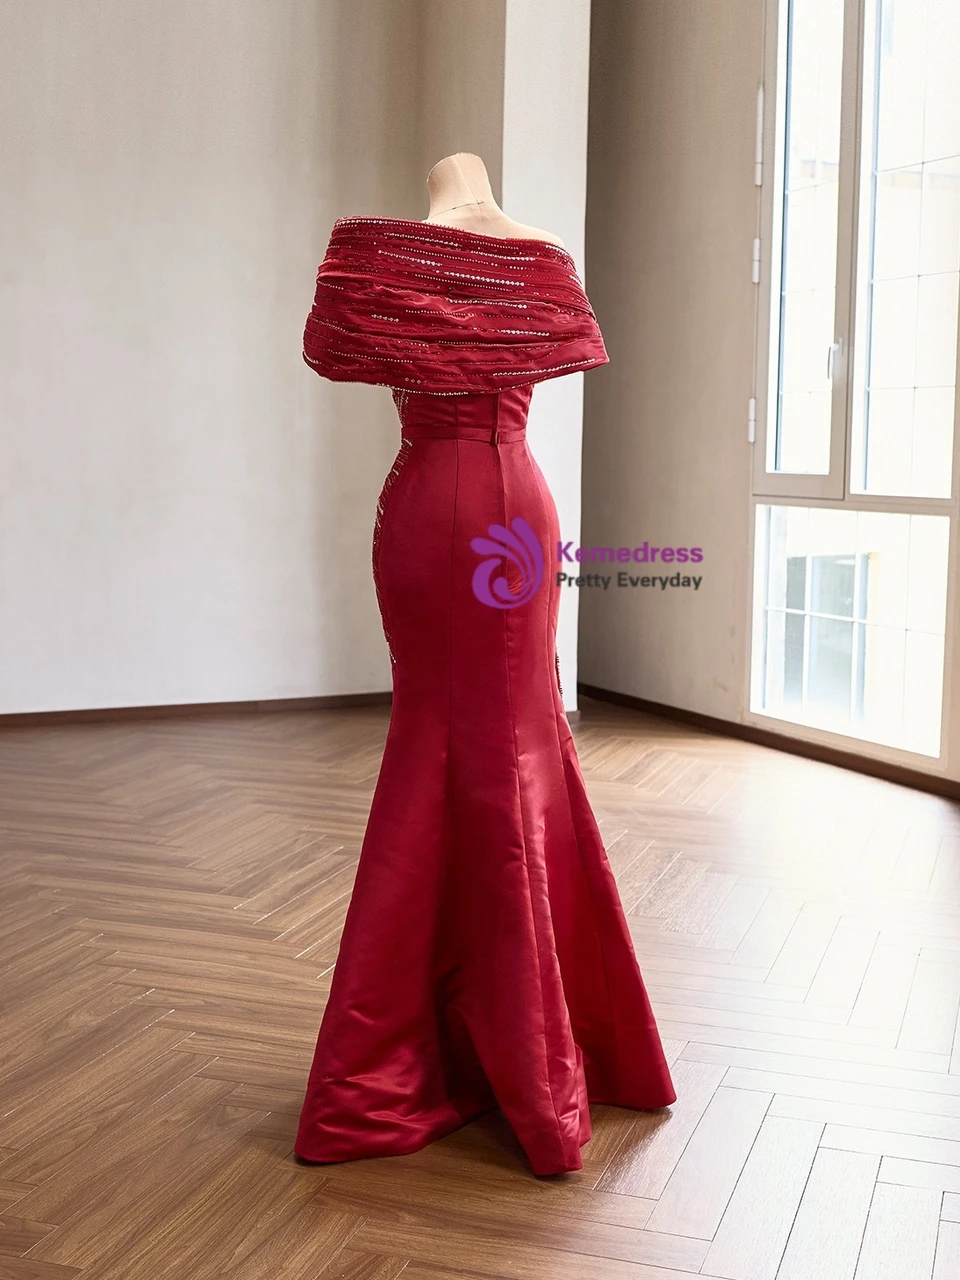
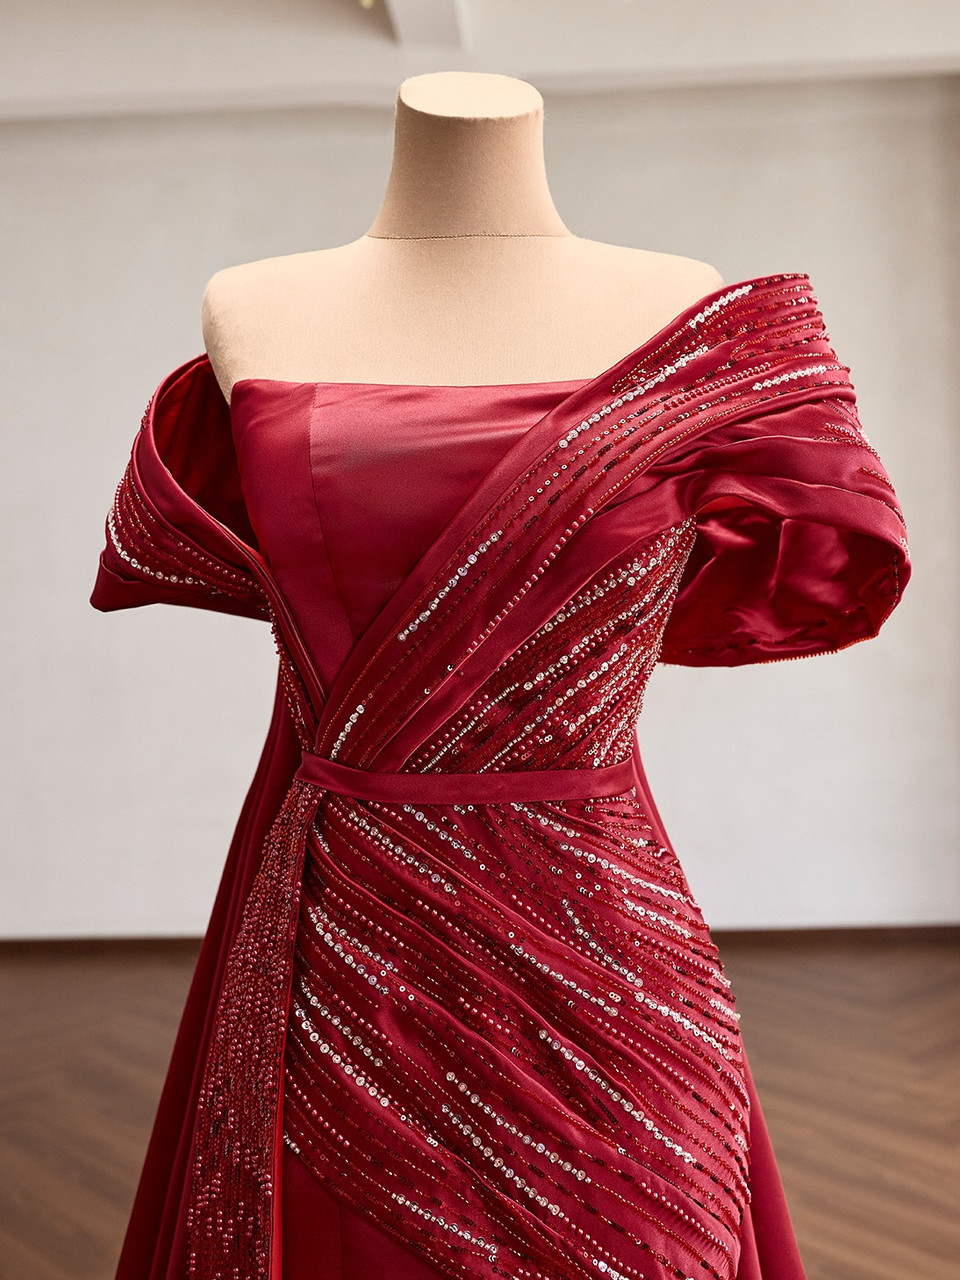
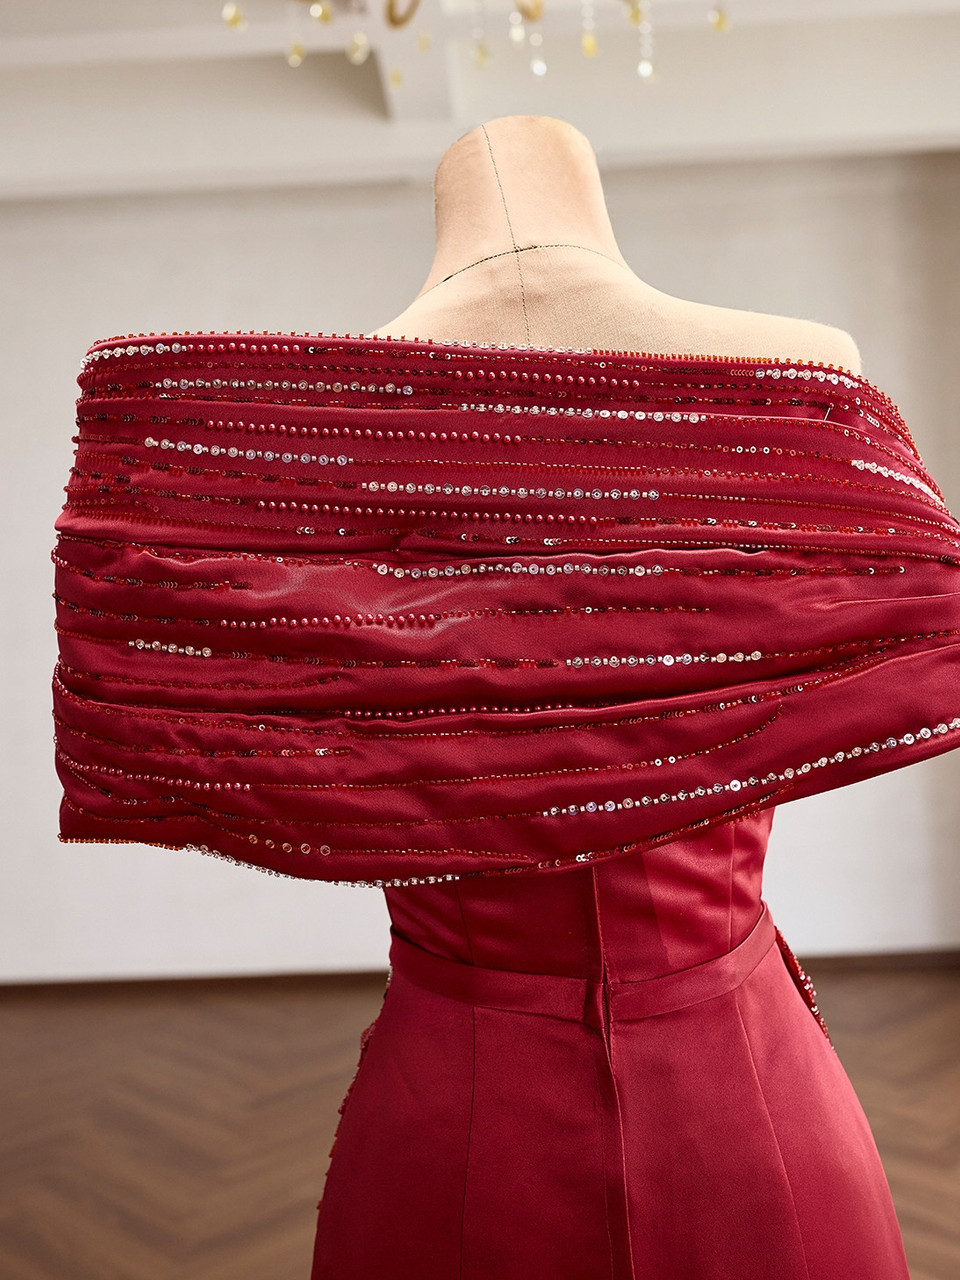
The finished surface is the visible expression of the construction sequence: the support holds the form, the beadwork follows the sculpted folds, and the detachable train changes the proportion of the final silhouette.
For a broader look at red formal silhouettes, explore red wedding dresses and red prom dresses.
See the Gown Behind the Process
View the finished red satin mermaid gown, including its sculpted pleats and detachable train.
View the Red Beaded Pleat GownThe Work Behind the Image
The finished photograph shows the gown after everything has settled into place. It does not show the muslin tests, the beader's threads, the bent pins or the repeated adjustments behind the shoulder folds.
That process is part of the construction itself. The final appearance depends not only on the satin, beads and crystals, but also on the order of the work, the control of the fabric and the patience required to refine each fold.
Frequently Asked Questions
Is the train on this red beaded pleat gown detachable?
Yes. The train is cut from its own separate pattern and attaches with covered hooks and snaps concealed along the waist seam beneath the pleated panel. With the train attached, the gown has a more formal extended silhouette; with it removed, the fitted mermaid dress has a cleaner outline and greater freedom of movement.
Why is the beading done before the pleats are shaped?
The satin panel stays flat while every bead, sequin and crystal is stitched into diagonal rows. This gives the beader a stable surface for alignment and stitching. Once the panel is shaped, the embellishment follows the outer ridges of the folds, allowing the crystals and sequins to catch light at different depths.
What occasions suit a red beaded pleat mermaid gown?
The fitted mermaid silhouette and hand-beaded surface suit prom, formal galas, evening receptions and statement bridal styling. The detachable train allows the same gown to move between a formal entrance and a more practical reception silhouette.
How should a hand-beaded gown be cleaned and stored?
Hand-sewn beads, sequins and crystals should not be placed in a washing machine. Keep perfume and hairspray away from the embellished surface and store the gown in a breathable garment bag away from direct sunlight. Avoid pressing an iron directly onto the beaded areas.
How do I choose the right size for a fitted beaded gown?
Measure your bust, waist and hips and compare them with the size chart rather than relying on your usual clothing size. A fitted boned bodice and hand-beaded surface leave limited room for alteration, so accurate measurements are especially important.
Related Workroom Stories
Continue exploring Kemedress craftsmanship through other projects involving hand embellishment, custom construction and detachable designs.
HAND BEADING
Tracing the Beadwork of a Pink Ball Gown Prom Dress
Follow another Kemedress workroom project focused on detailed hand embellishment.
Read the Beadwork Story →CONVERTIBLE FORMALWEAR
How We Make a Champagne Pink Prom Dress with a Detachable Train
Explore another formal gown where the detachable train changes the styling possibilities.
Explore the Detachable Train Story →CUSTOM CONSTRUCTION
Inside Our Workshop: The Real Process Behind Creating a Custom Beaded Wedding Dress
See another Kemedress workroom project centered on custom beaded gown construction.
Explore the Workshop Story →